Color with the Cat
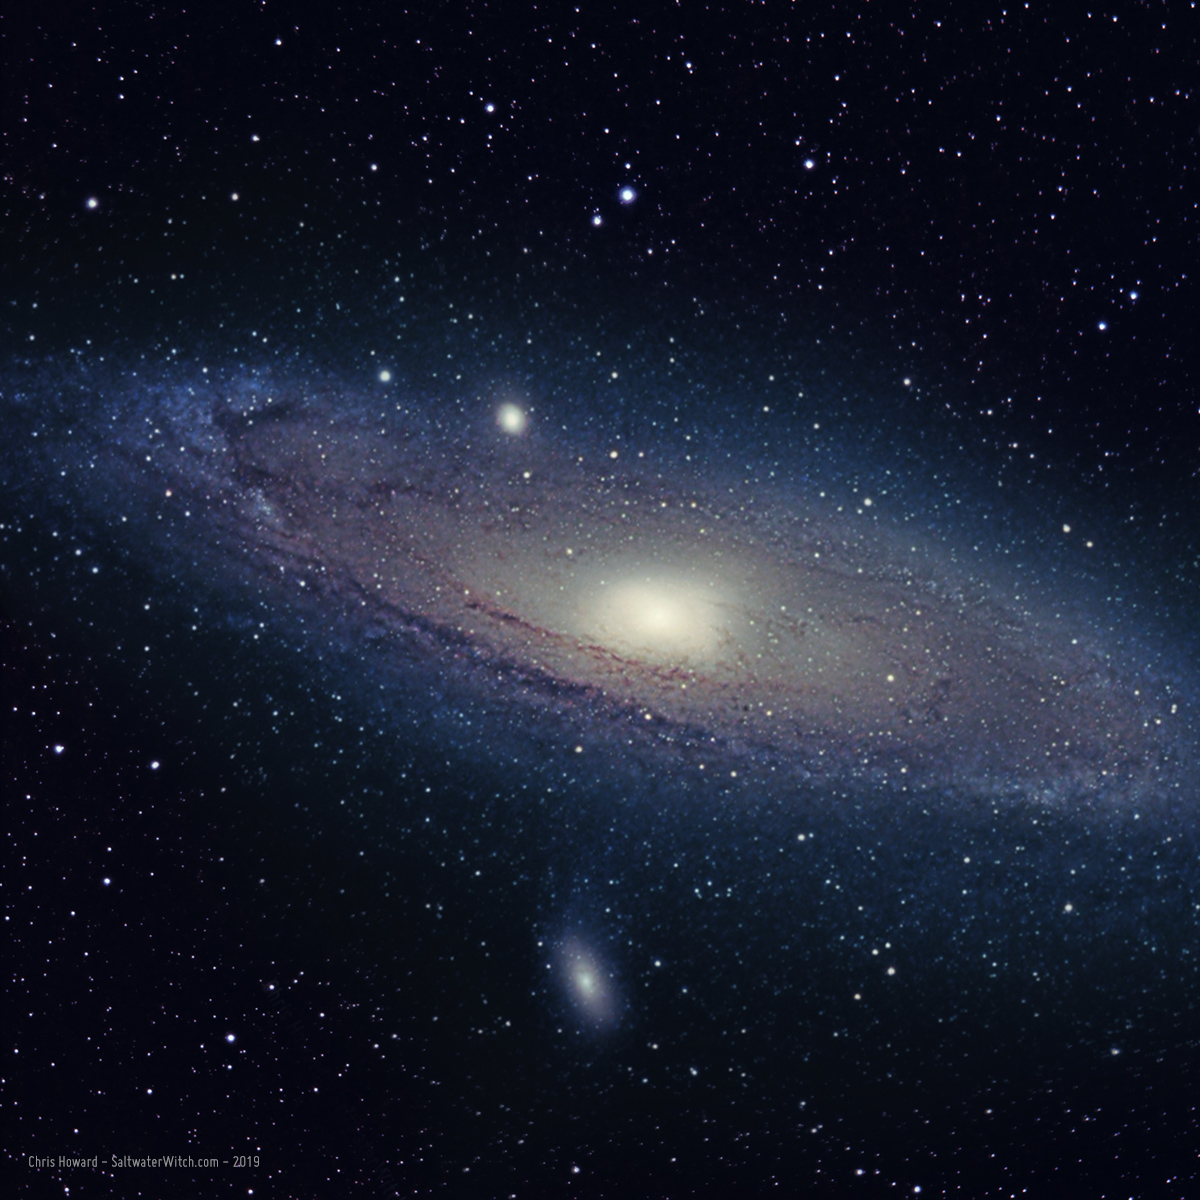
I set up the William Optics SpaceCat 51 with my color imaging train--ZWO ASI071MC, OAG, QHY guide cam--to test out focusing and test sequences in SGP, running through M31, M33, and M45 before the moon rose and washed out the sky. Seeing was not that great last night, but it was clear enough for testing. The Cat51 is such an easy scope to work with. I used the Frame and Focus panel in Sequence Generator Pro, and in a couple minutes had really sharp stars with a dialed in HFR. I went through the next five hours of imaging without adjusting focus.
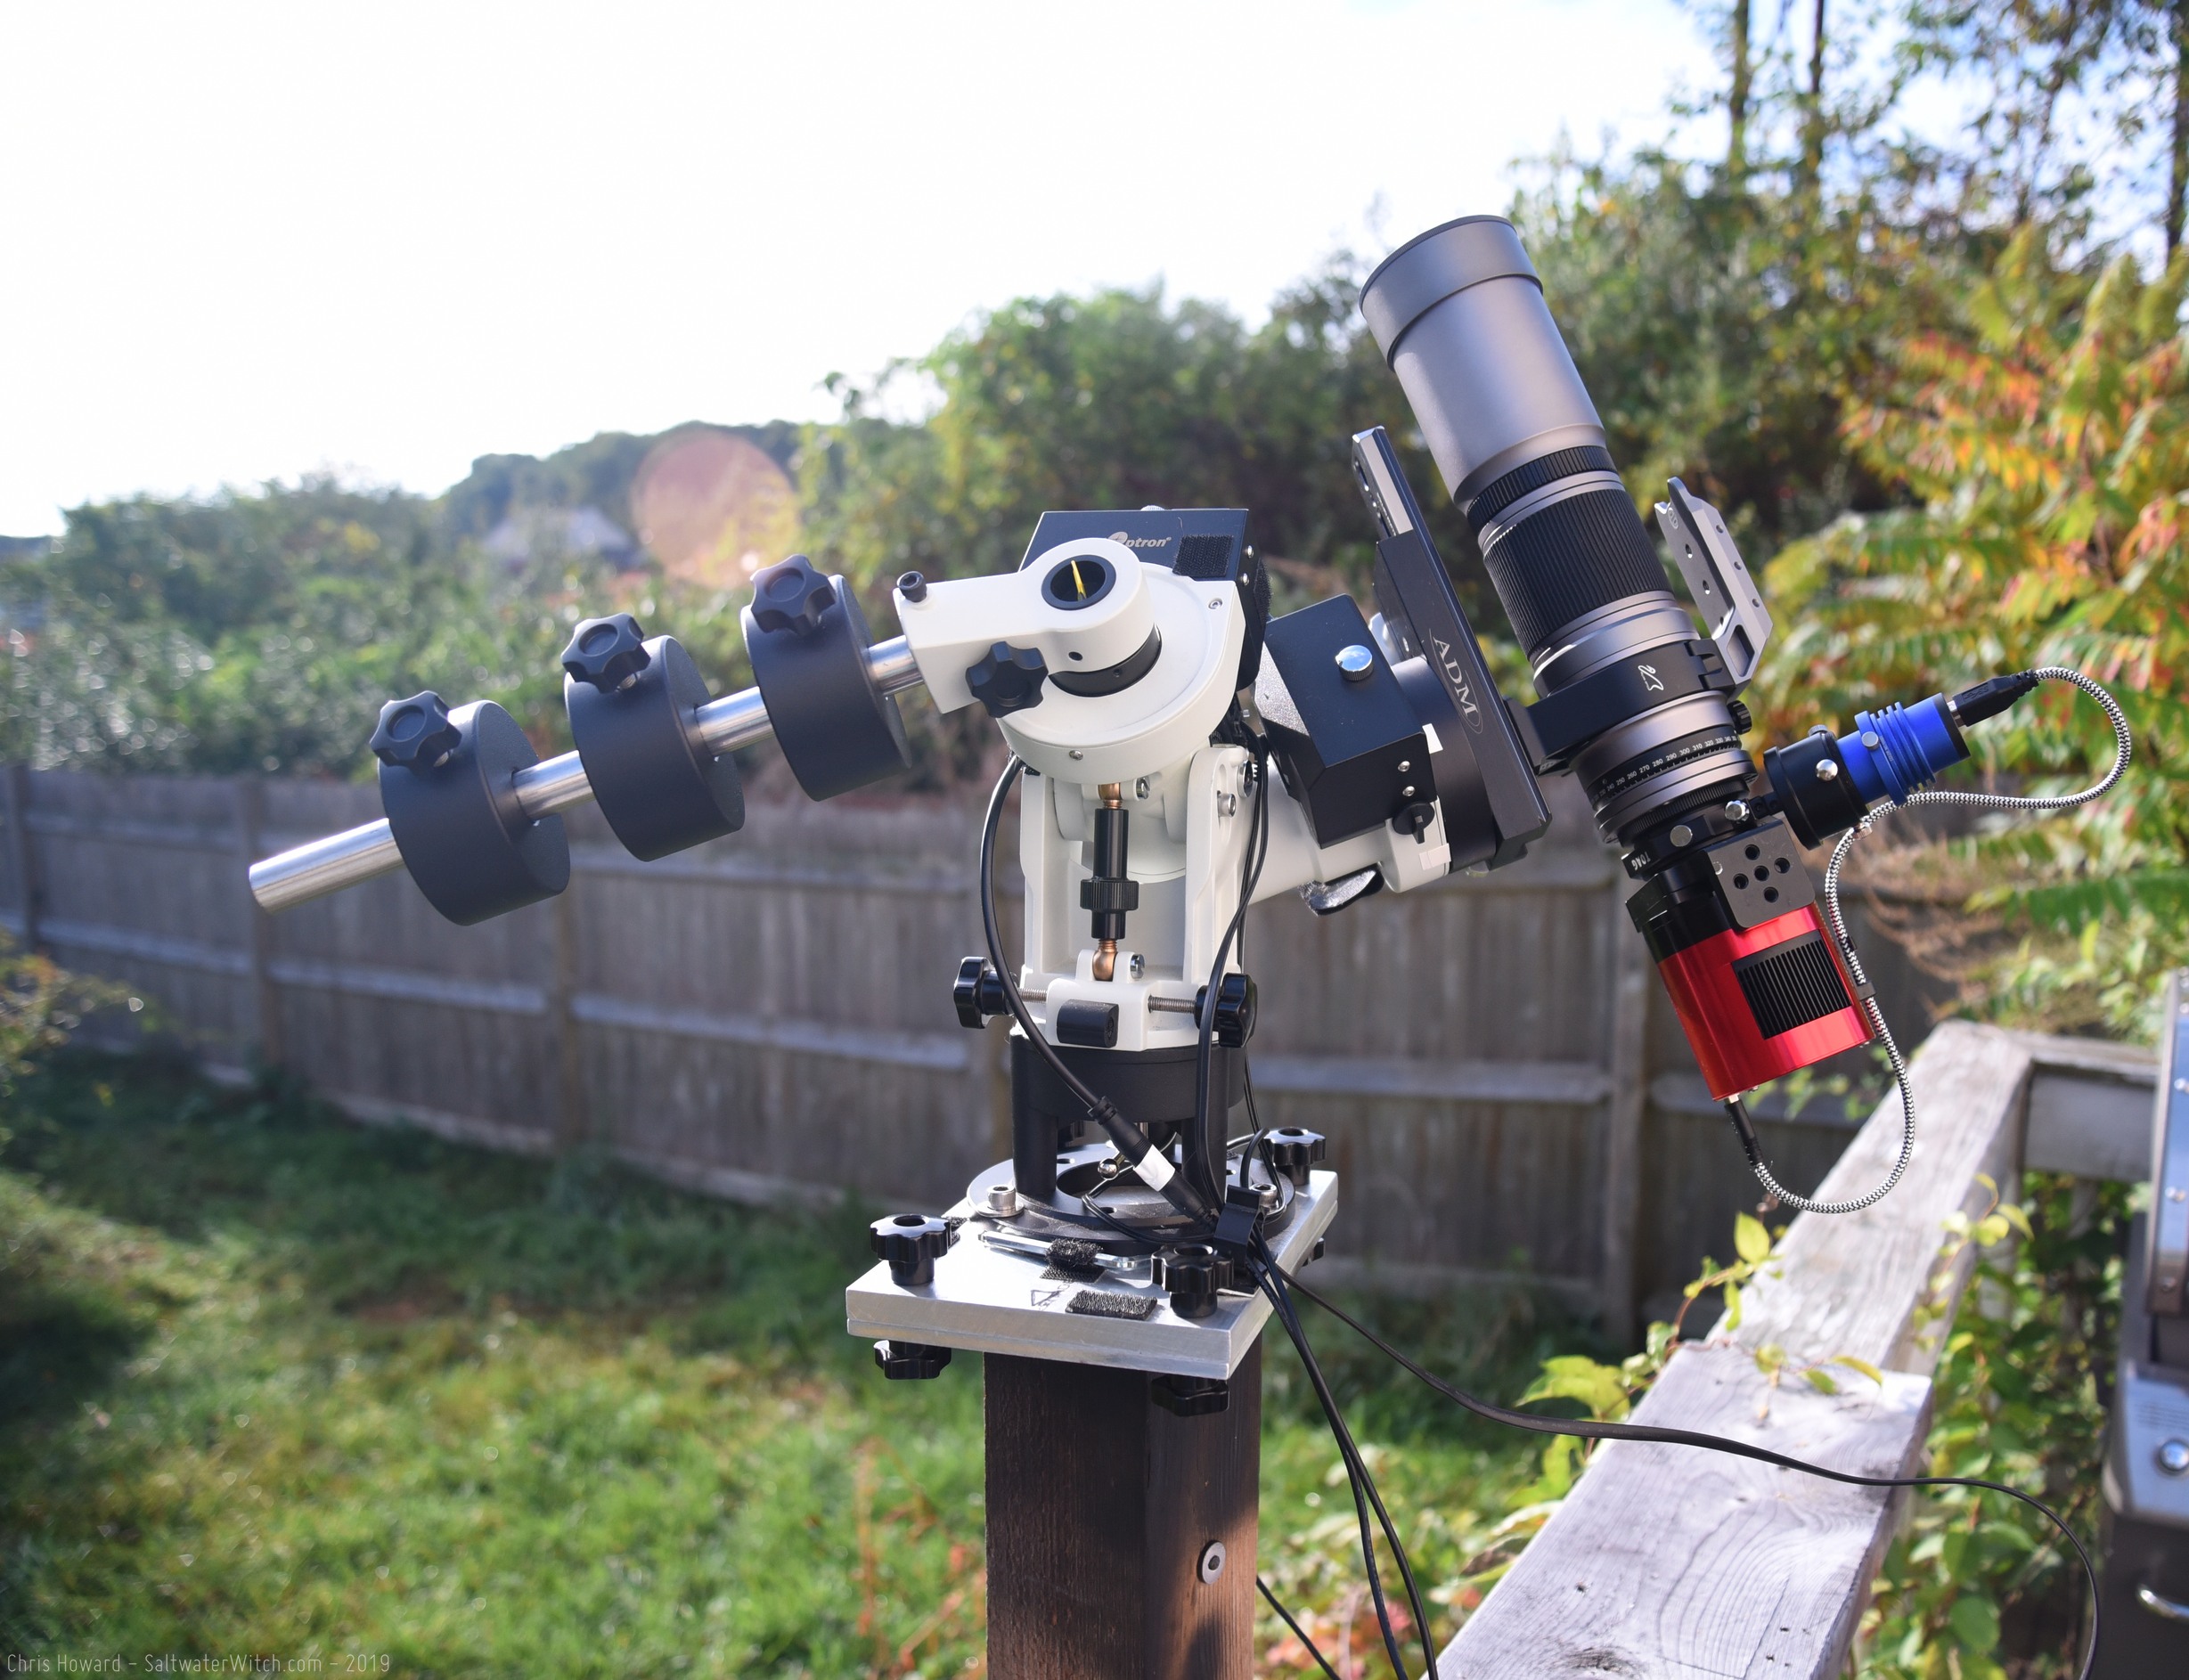
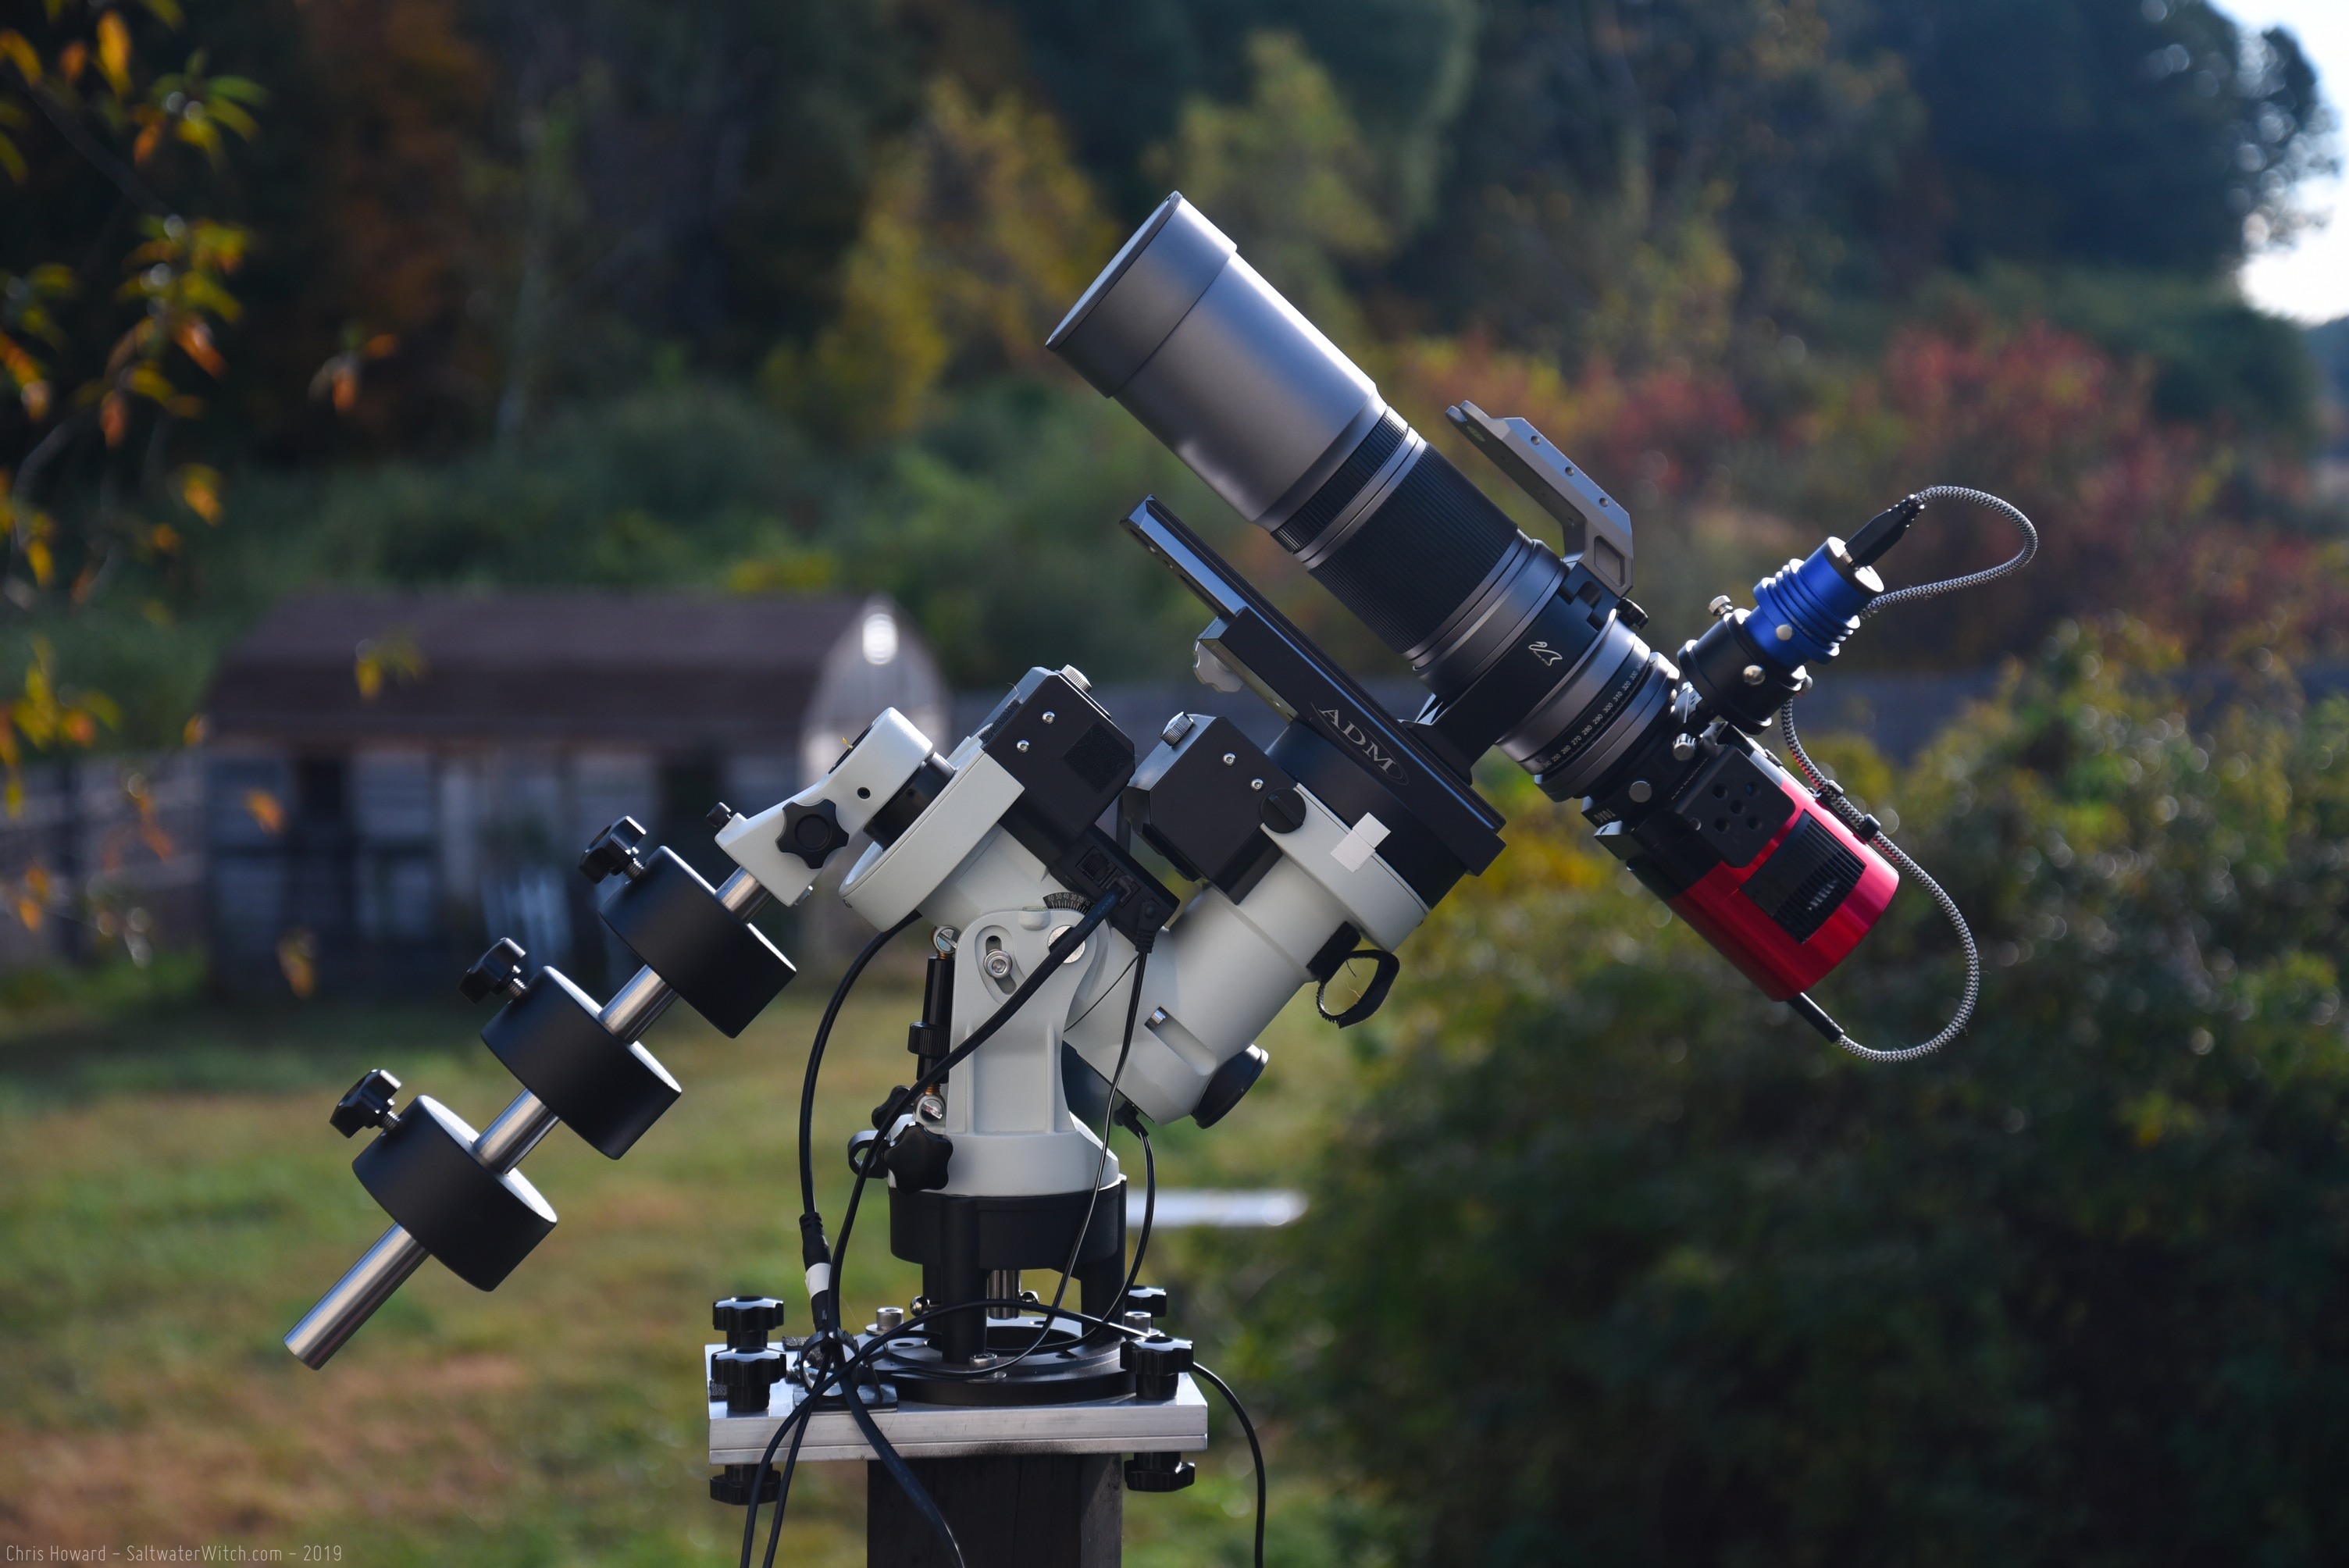
Here's my setup for color imaging: William Optics SpaceCat51 250mm FL, f/4.9, ZWO ASI071MC cooled color camera, Orion Thin Off-axis Guider, QHY 5iii178 guide camera, iOptron CEM25P mount.
Posted October 20, 2019
NGC 7000 with the William Optics SpaceCat 51 APO Refractor
We finally had a clear night. The only problem was the moon rising around 8:30 pm. I still had an hour of darkness before that, and used it to run some tests with my new William Optics SpaceCat 51 APO Refractor (250mm FL, f/4.9). I was already impressed by the build quality and design characteristics of this extremely portable, wide-field scope. The edge-to-edge sharpness of the images I shot during some daylight testing astounded me. So I was not surprised that my first shots of nebulae with this small but versatile refractor were beautiful. William Yang and the team at William Optics continue to innovate, creating new and more capable telescopes, while advancing and adapting their existing product lines for new and more demanding uses (Have you seen the new Fluorostar 156? Holy Zeus doing jumping-jacks, that's a beautiful refractor). The SpaceCat 51 (the limited edition space grey version of the RedCat 51) is my third William Optics scope--I started with a GT81, and I'm certain there will be more as time goes by.
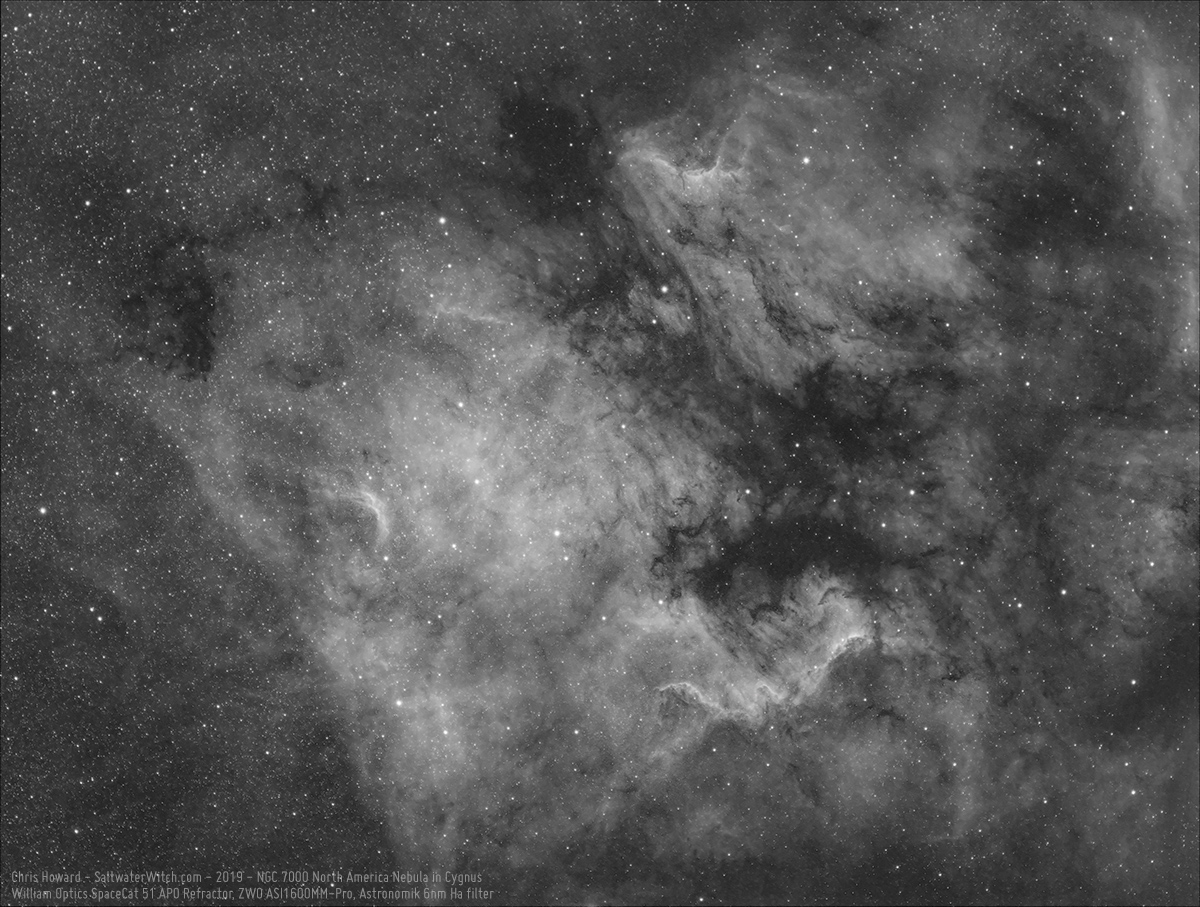
Here's a stack of 10 subs of NGC 7000, North America Nebula in Cygnus, with a bit of the surrounding region including the Pelican Nebula. This is 10 x 240 second exposures stacked in DSS--no calibration frames, shot with a William Optics SpaceCat 51, ZWO ASI1600MM-Pro mono camera, and Astronomik 6nm Hydrogen-alpha filter. I'm using an Orion Thin Off-axis Guider and ZWO ASI120M-mini with this train, and guiding was spectacular. I didn't crop or do anything crazy with this stack, just normal processing in Photoshop CC 2019.
NGC 7000 (North America Nebula), IC 5070 (Pelican Nebula) and IC 5068 (lower right) are all part of the same HII region in the constellation Cygnus. NGC 7000 is about 2600 lightyears away in the Orion Arm of our the Milky Way. With this field of view, we can see over 140 trillion miles of clouds of interstellar ionized hydrogen, lit by the massive binary star HD 199579, located approximately where Chicago would be. The dark bands and filaments of dust in front of these vast glowing clouds (LDN 935, B 352, 356) help form the eponymous North America shape, blocking out a large region for the "Gulf of Mexico", running up the "East Coast" and across the "Northeast Passage".
Posted October 16, 2019
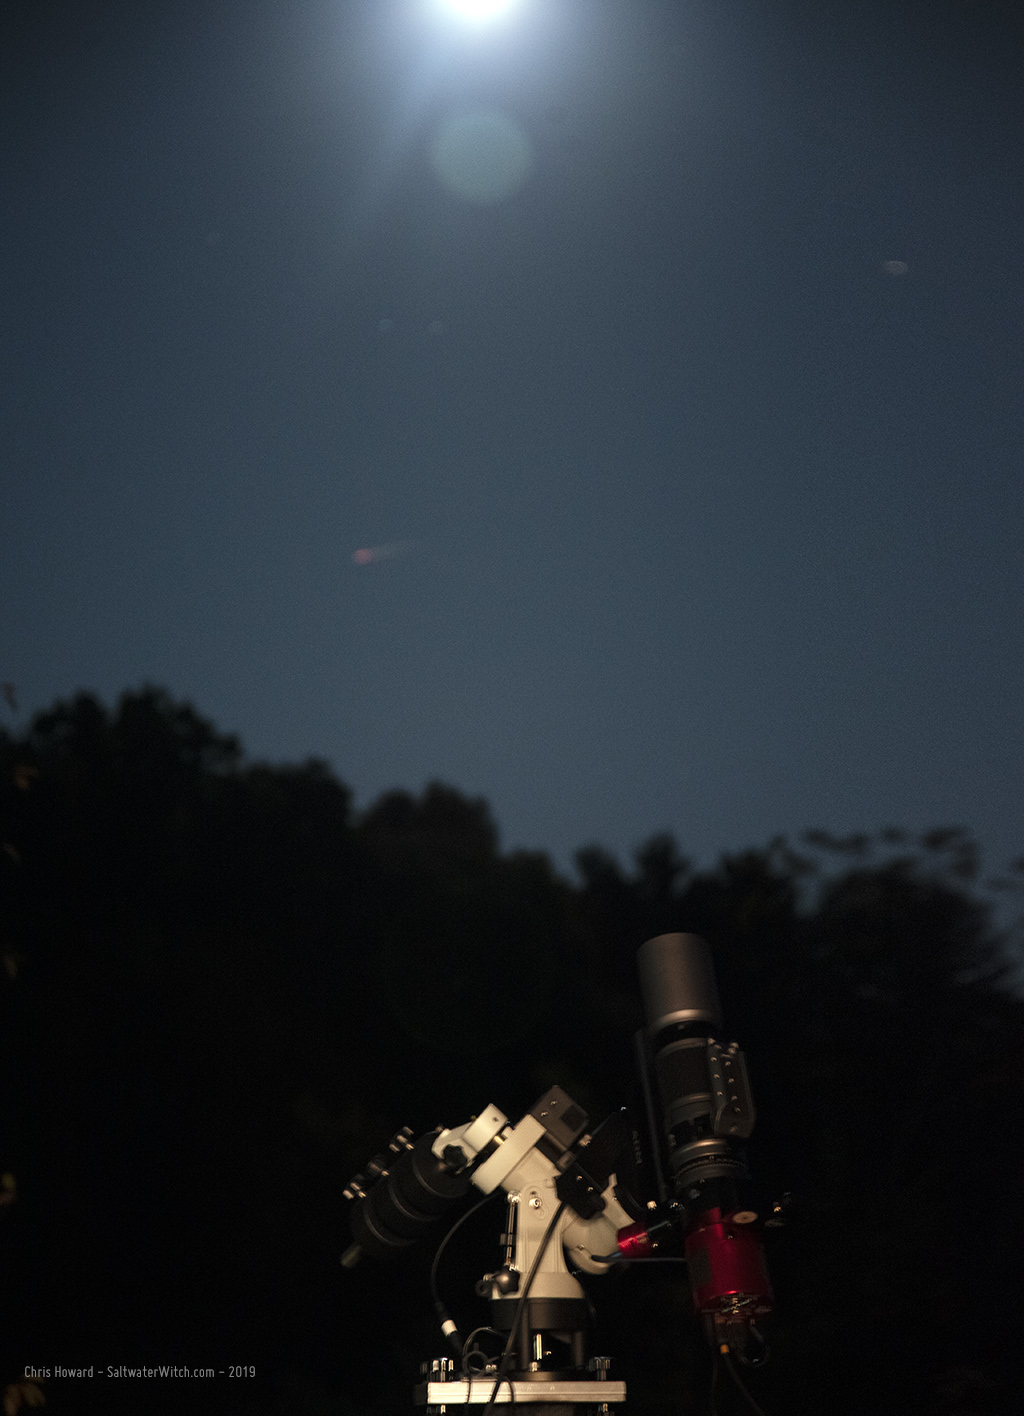
Not the best night for astrophotography...
I took a 1-sec exposure of the William Optics SpaceCat 51 during some narrowband subs. There's a beautiful moon out there, but that's not great for taking shots of deep sky objects.
Posted October 15, 2019
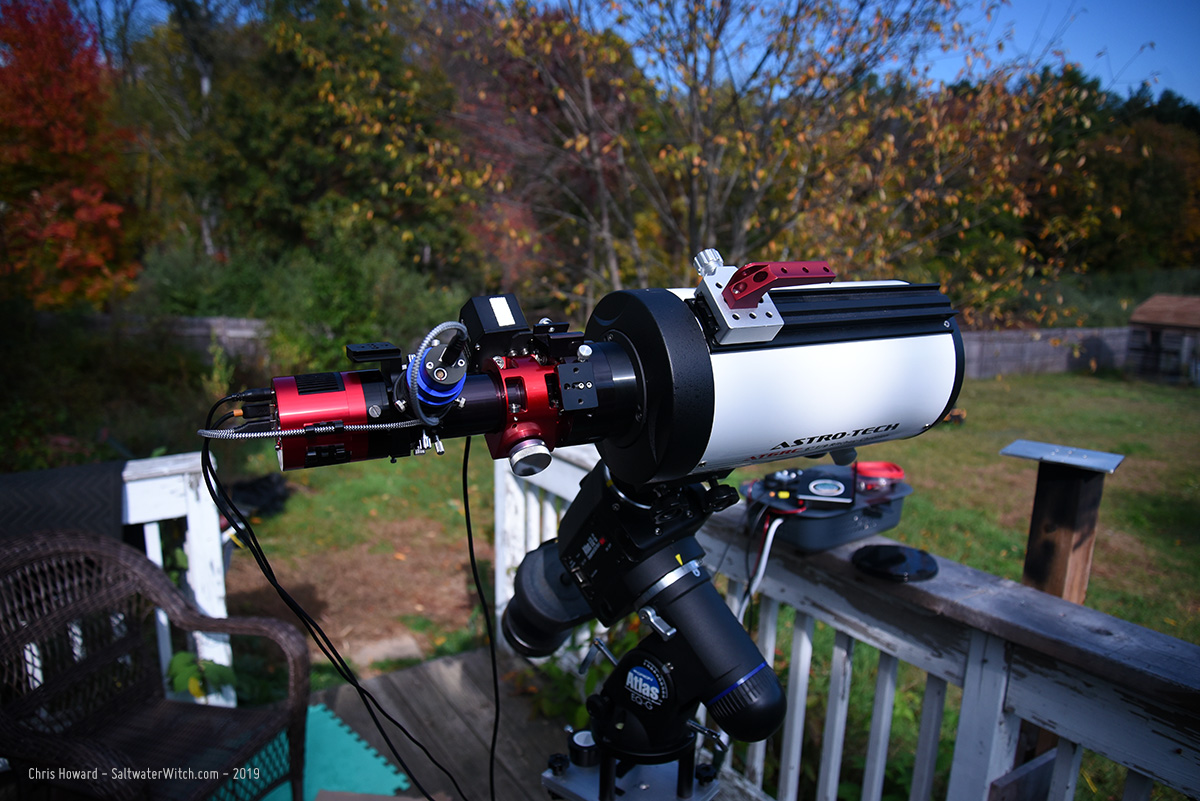
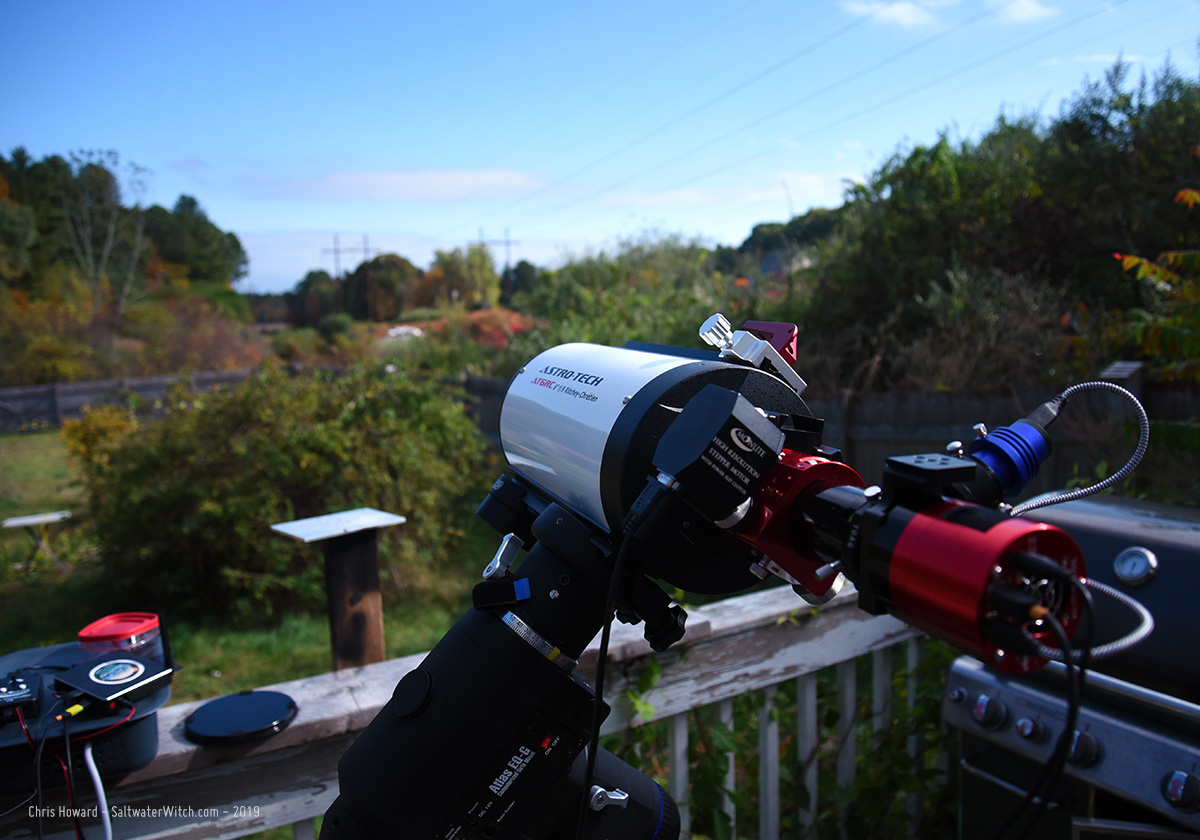
Moonlite Focuser on the AstroTech 6 Ritchey-Chrétien
I moved the Moonlite focuser from the William Optics GT81 to the AT6RC scope and spent half an hour getting the focus distance more-or-less dialed in. I'm focusing on a tree line about 1600 feet / .5km away. That transmission pole is almost 500 feet closer to me. I'm using the color imaging train with the ZWO ASI071C and a longpass hydrogen-alpha filter, which is why the test frame has that white-tree IR look. In the images with the setup you can see the color in the trees. It's a beautiful fall day out there, although I don't think it's supposed to be that clear tonight. Just have to wait and see!

Posted October 14, 2019
Focus Testing for the William Optics SpaceCat 51
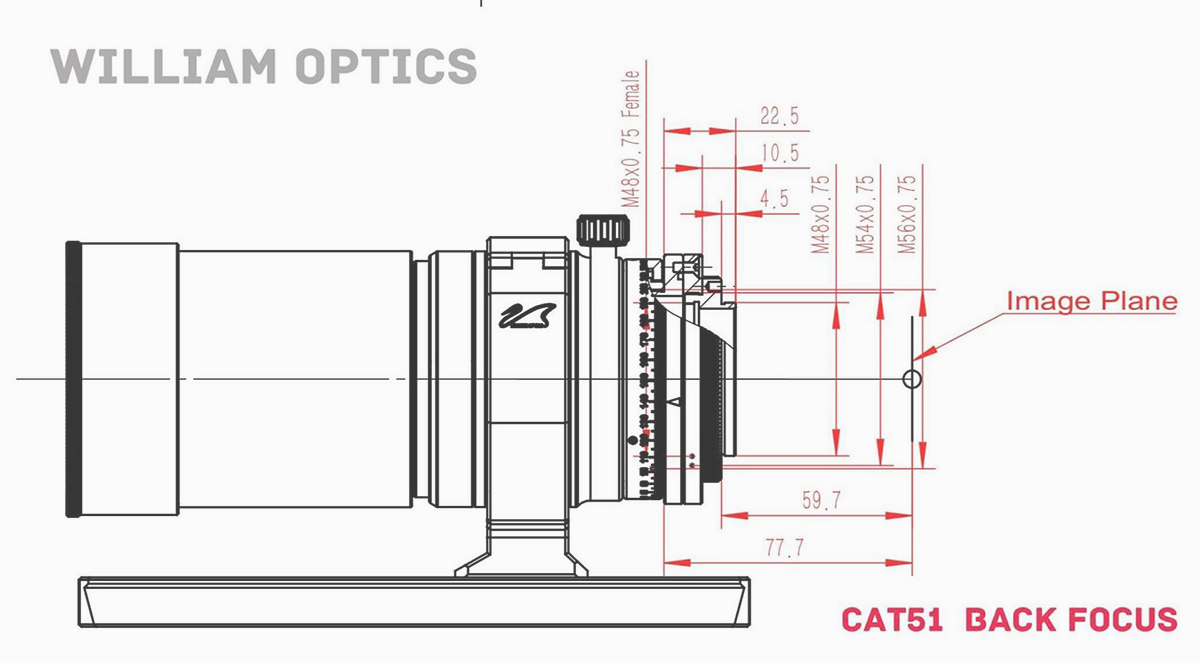
According to the William Optics SpaceCat 51 backfocus specs, I have a 59.7 mm backfocus from the flange face of M54->M48 adapter. The SpaceCat has a different configuration from the first generation RedCat. It includes a tilt adjust ring with a 54mm threaded facing (Takahashi wide mount 54 mm, 0.75 pitch thread) plus an M54 to M48 (T2) adapter. I think William Optics designed the thickness of the last adapter to avoid changing backfocus specifications across the various cats. And so any configuration I have will work with the original RedCat 51s as well as other breeds--WhiteCat, BlackCat, and K-Astec Limited Edition.
I have two main astro imaging trains, and both come in under 57mm. The color train is a ZWO ASI071MC, 2" filter drawer, Orion Thin Off-axis Guider with QHY5iii178 guide camera. For daytime testing I threw in a 2" hydrogen-alpha longpass filter. My narrowband imaging train consists of a ZWO ASI1600MM-Pro, ZWO EFW (Clear, 6nm Ha, 6nm OIII, 6nm SII, 685nm Near-IR), Orion Thin Off-axis Guider with ZWO ASI120M-mini guide camera.
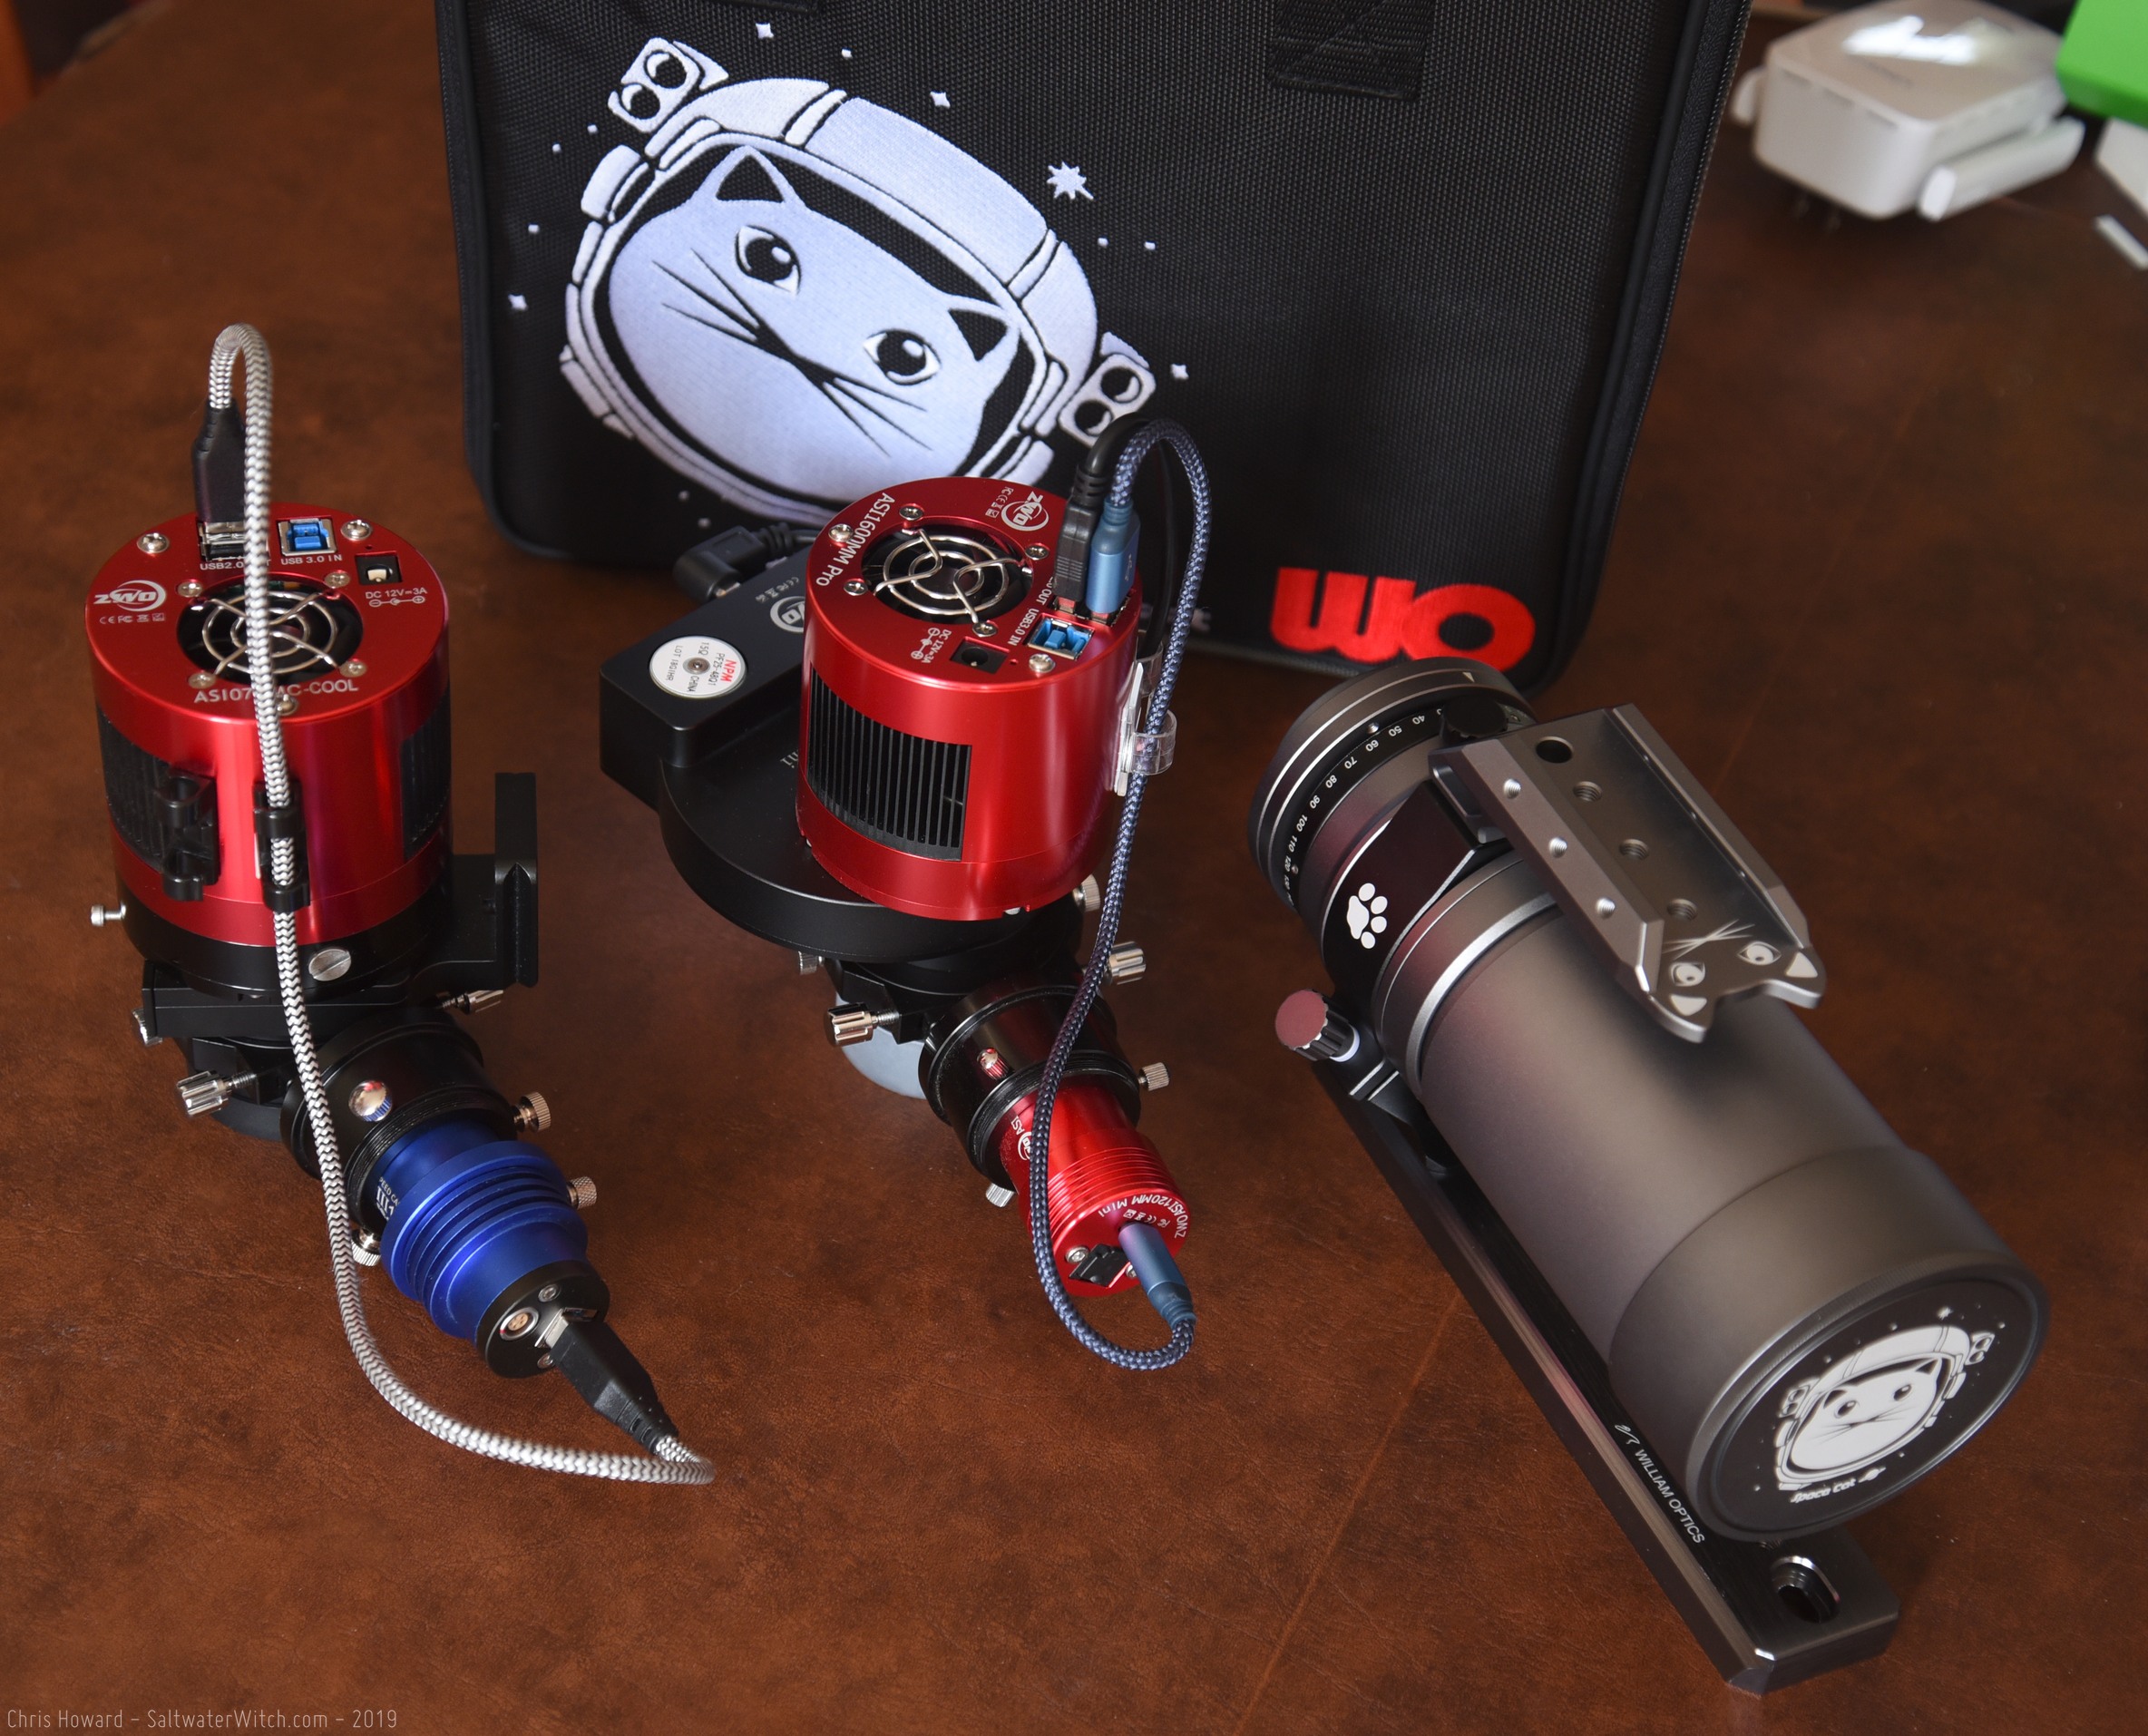
I set up the iOptron CEM25P this morning, and used SharCap Pro to test the focus for both trains. I'm happy with the results. The color train is a bit worrying because the ZWO ASI071MC has a crazy 17.5mm depth to sensor. I was able to focus on some distant trees, but the SpaceCat's focus ring was only slightly out from infinity. We'll see what my results are with the stars!
The ZWO ASI1600MM-Pro on the narrowband train only has a 6.5mm depth to sensor with the ZWO filterwheel, and I had the focus ring on the cat further out. Should be no problem with DSOs in this case. I may miss having autofocus though.
Some shots from my morning focus testing with the beautifully machined William Optics SpaceCat 51 apochromatic refractor.


Posted October 13, 2019
William Optics SpaceCat Limited Edition APO Refractor
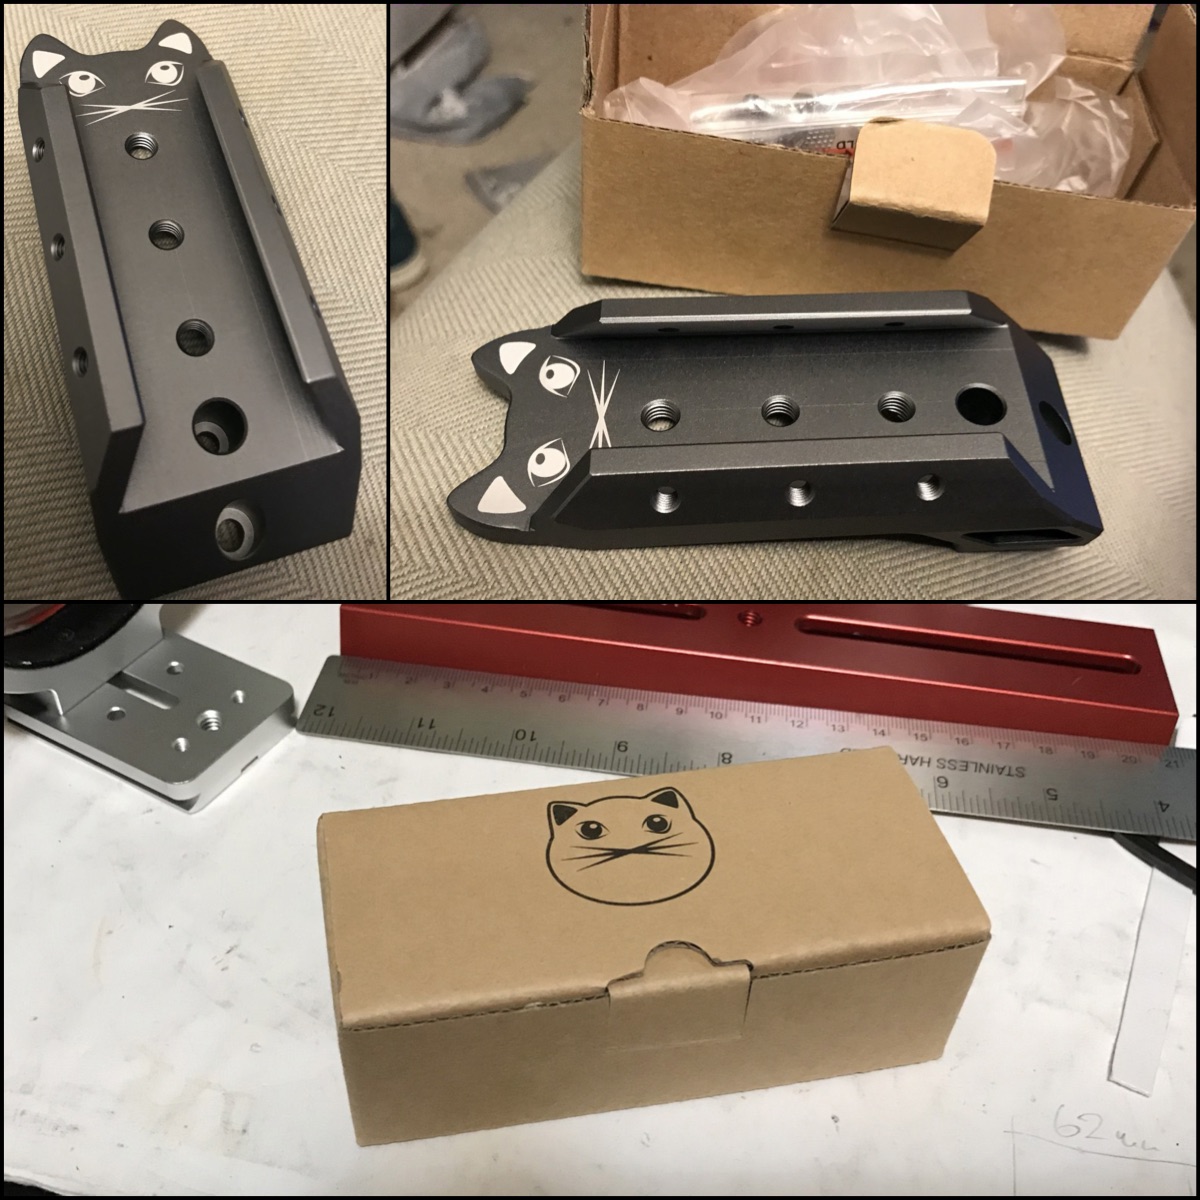
I'm pretty sure I got the last one at Highpoint Scientific. I also bought the Cat Saddle/Handle-bar.
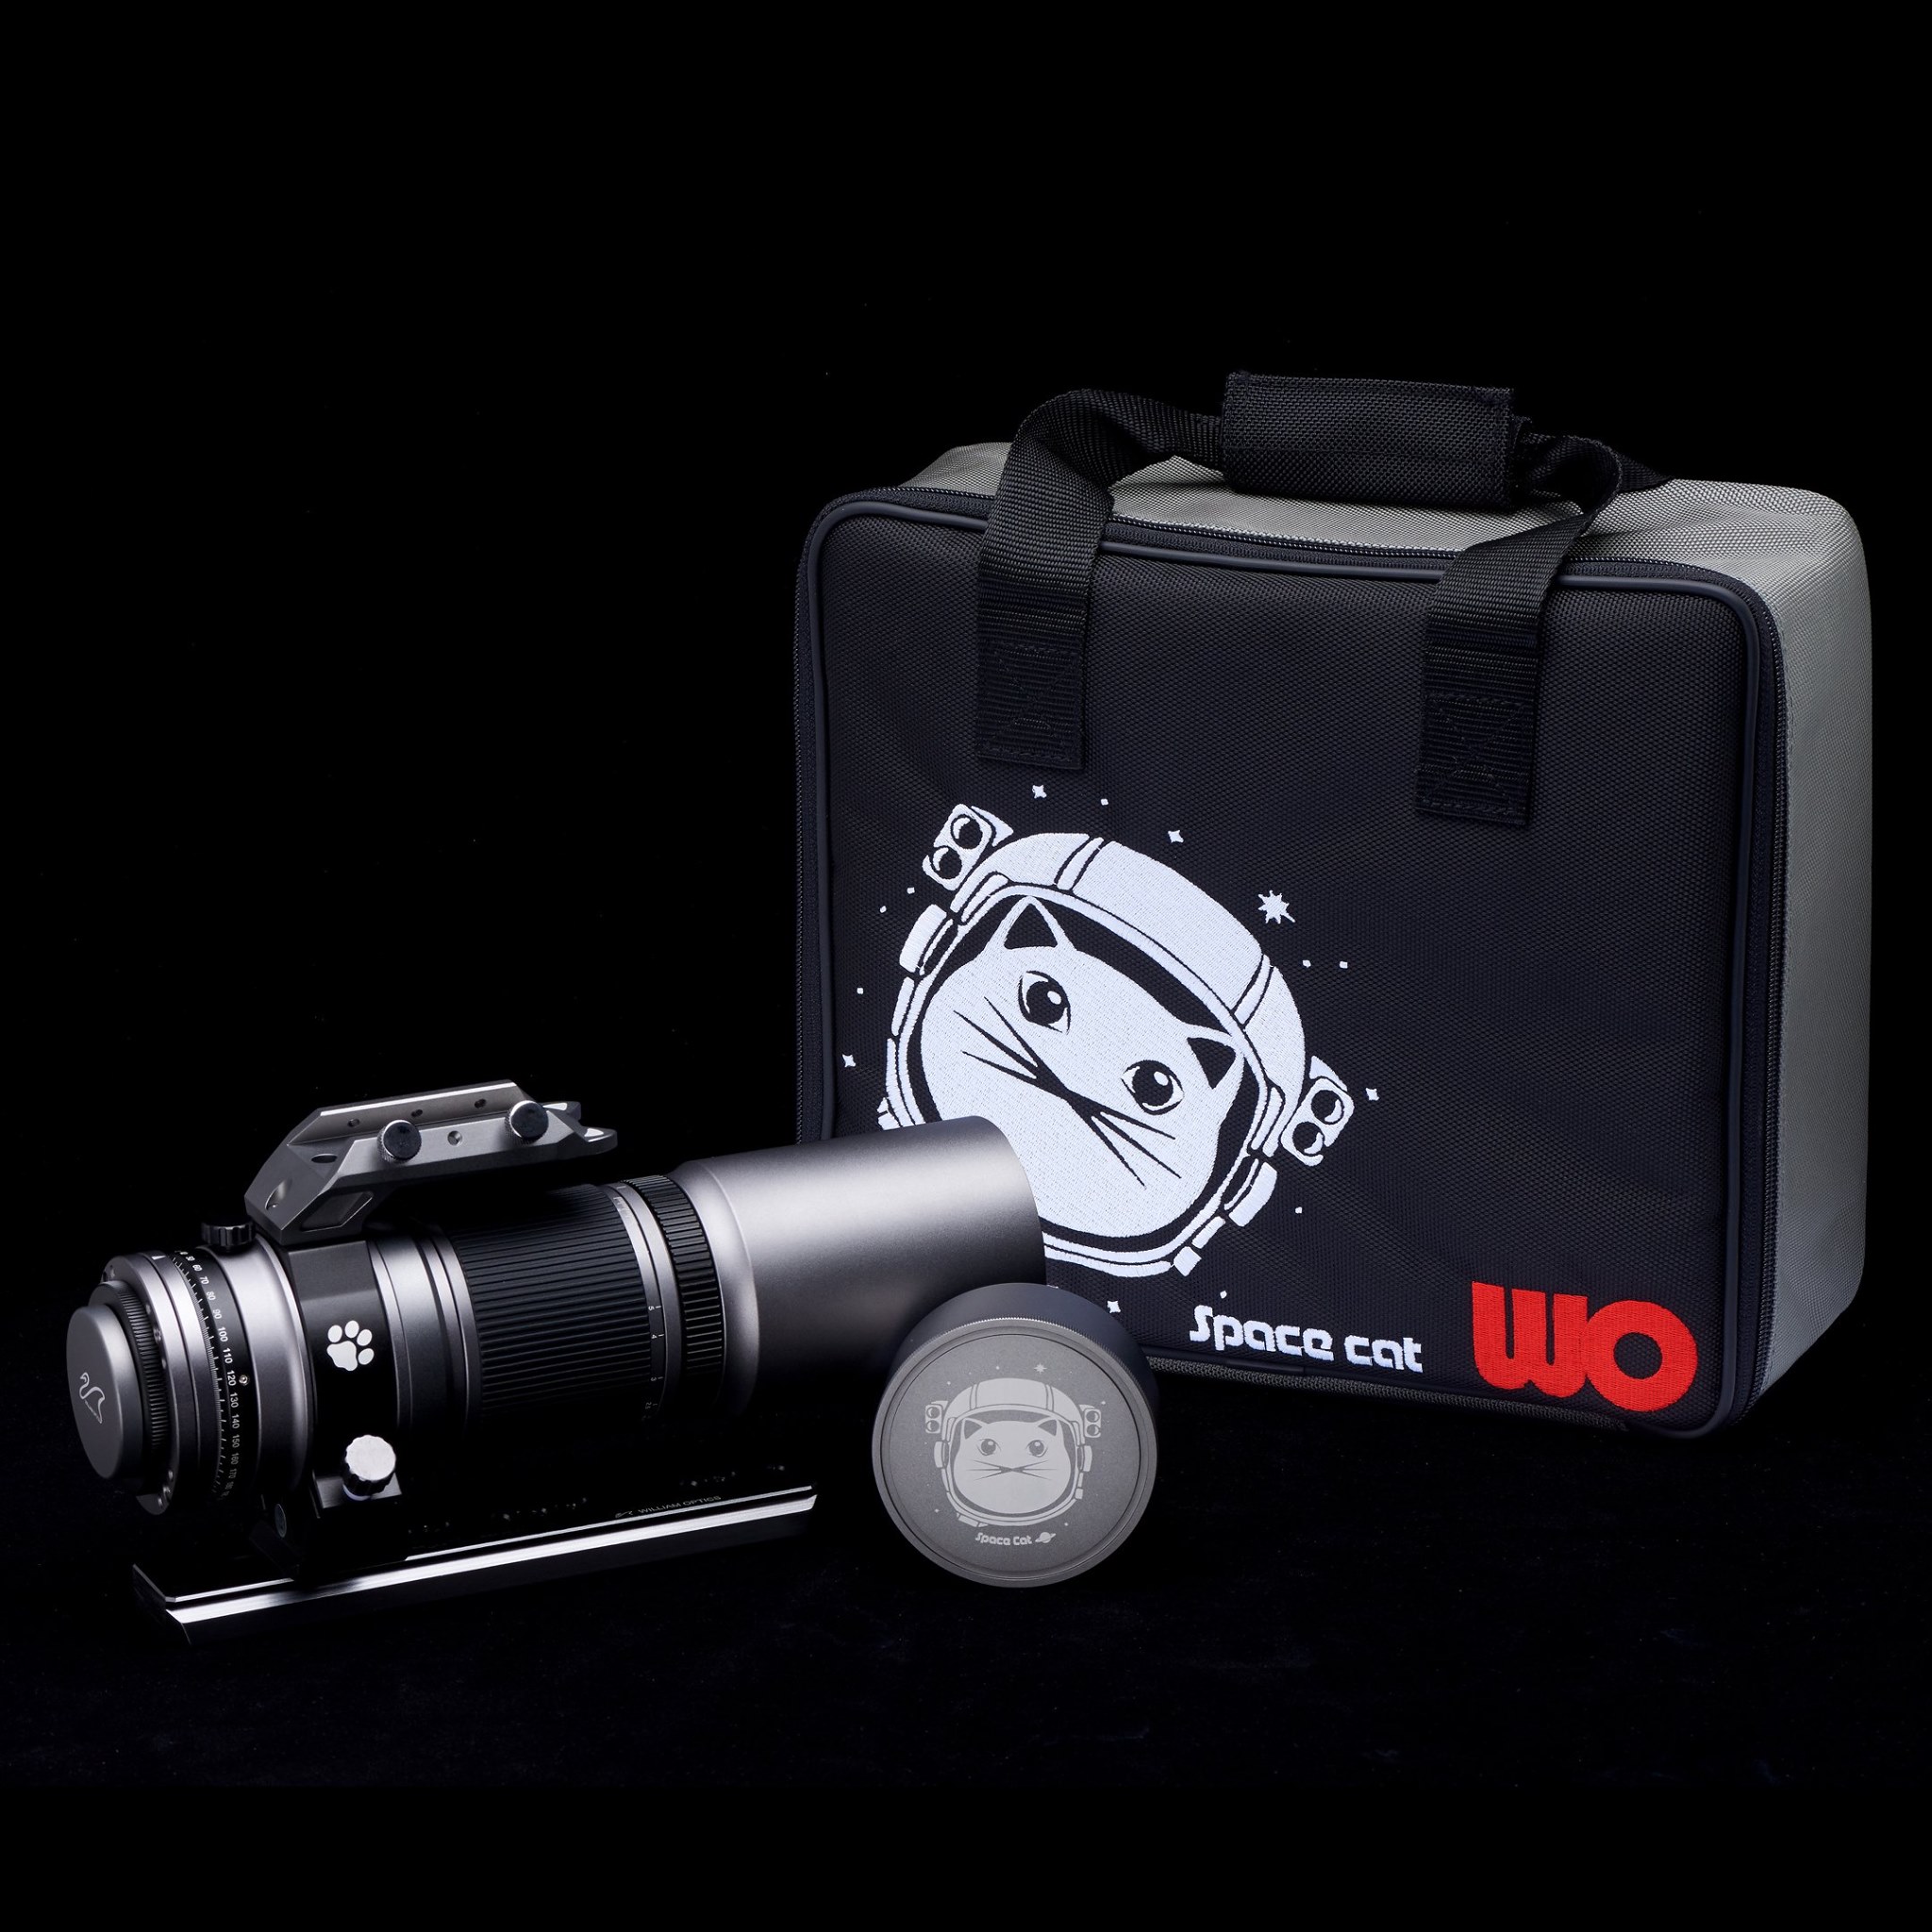
Let's take a look at the Space Gray version of the William Optics Cat Saddle/Handle-bar. That is a beautiful piece of hardware.
Posted October 8, 2019
Back up, see if you can get M33 in...
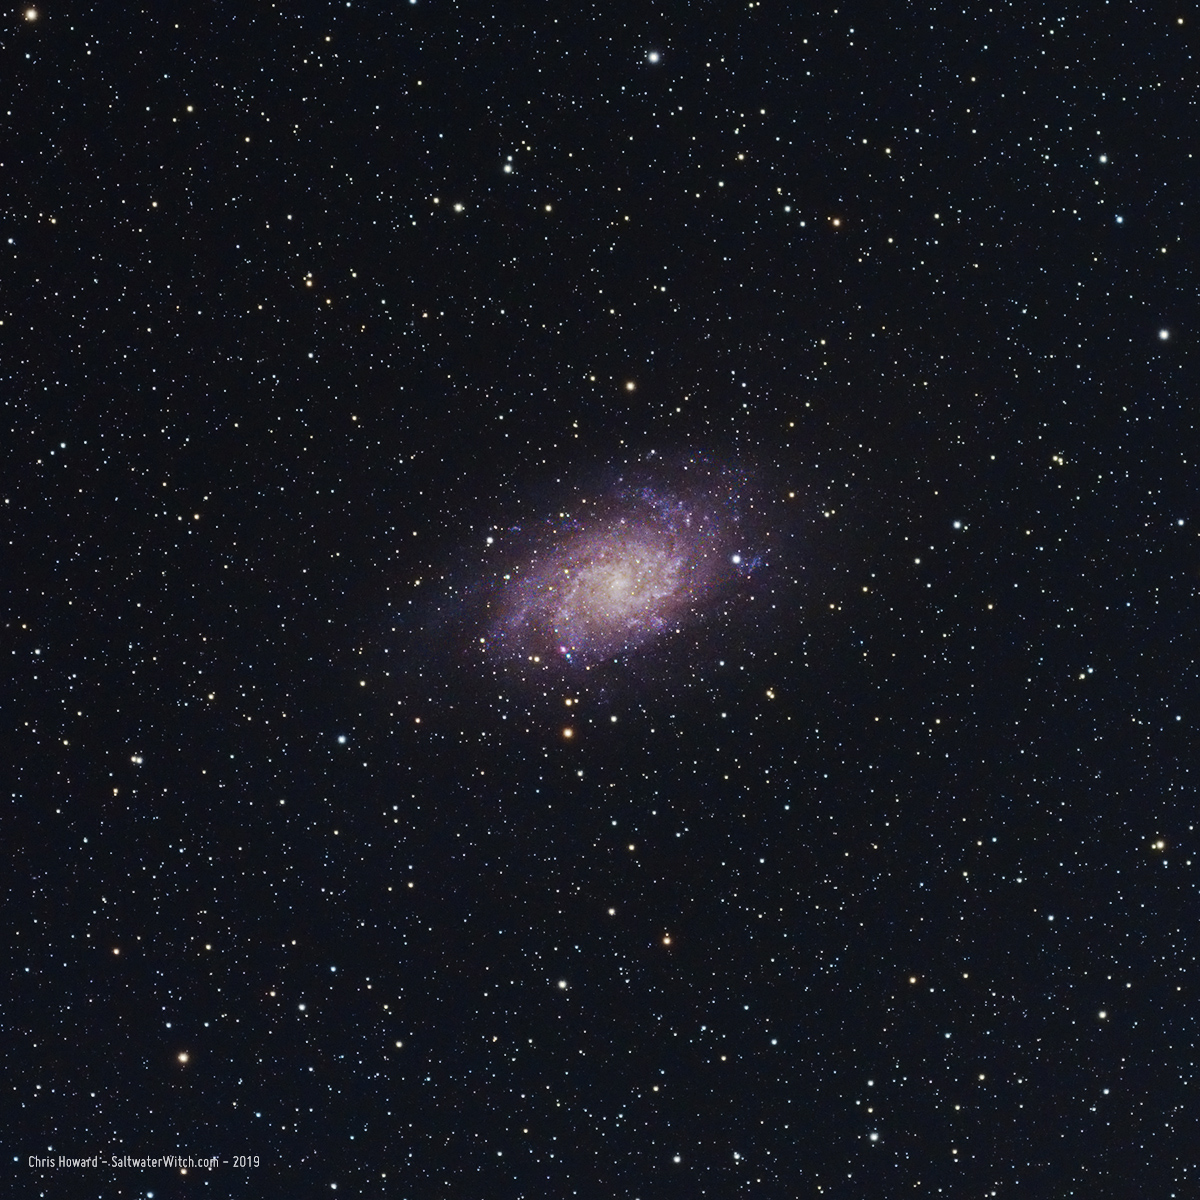
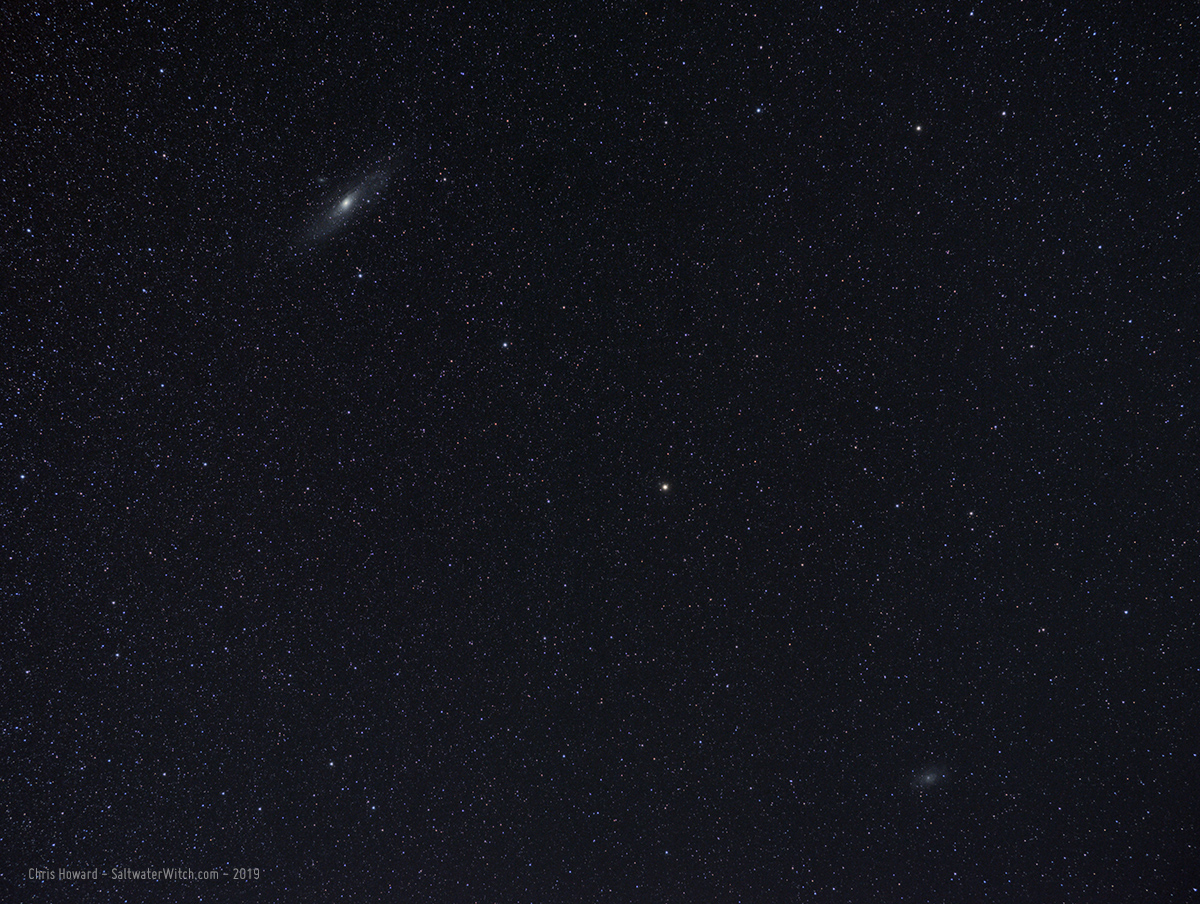
I didn't have much time last night, so I just went with the Nikon D750 + 70-300mm lens on the iOptron SkyGuider Pro. And shot 20 exposures of M31. I was actually just wheeling the camera around the sky, adjusting focus at 70mm when I saw Andromeda Galaxy in the upper left, and there was M33 Triangulum in the lower corner. This is cropped from the full image, and I probably could have framed these better, but I didn't feel like pushing my luck. M33 was down by the bottom edge. So I went with this, 20 stacked frames in DSS:
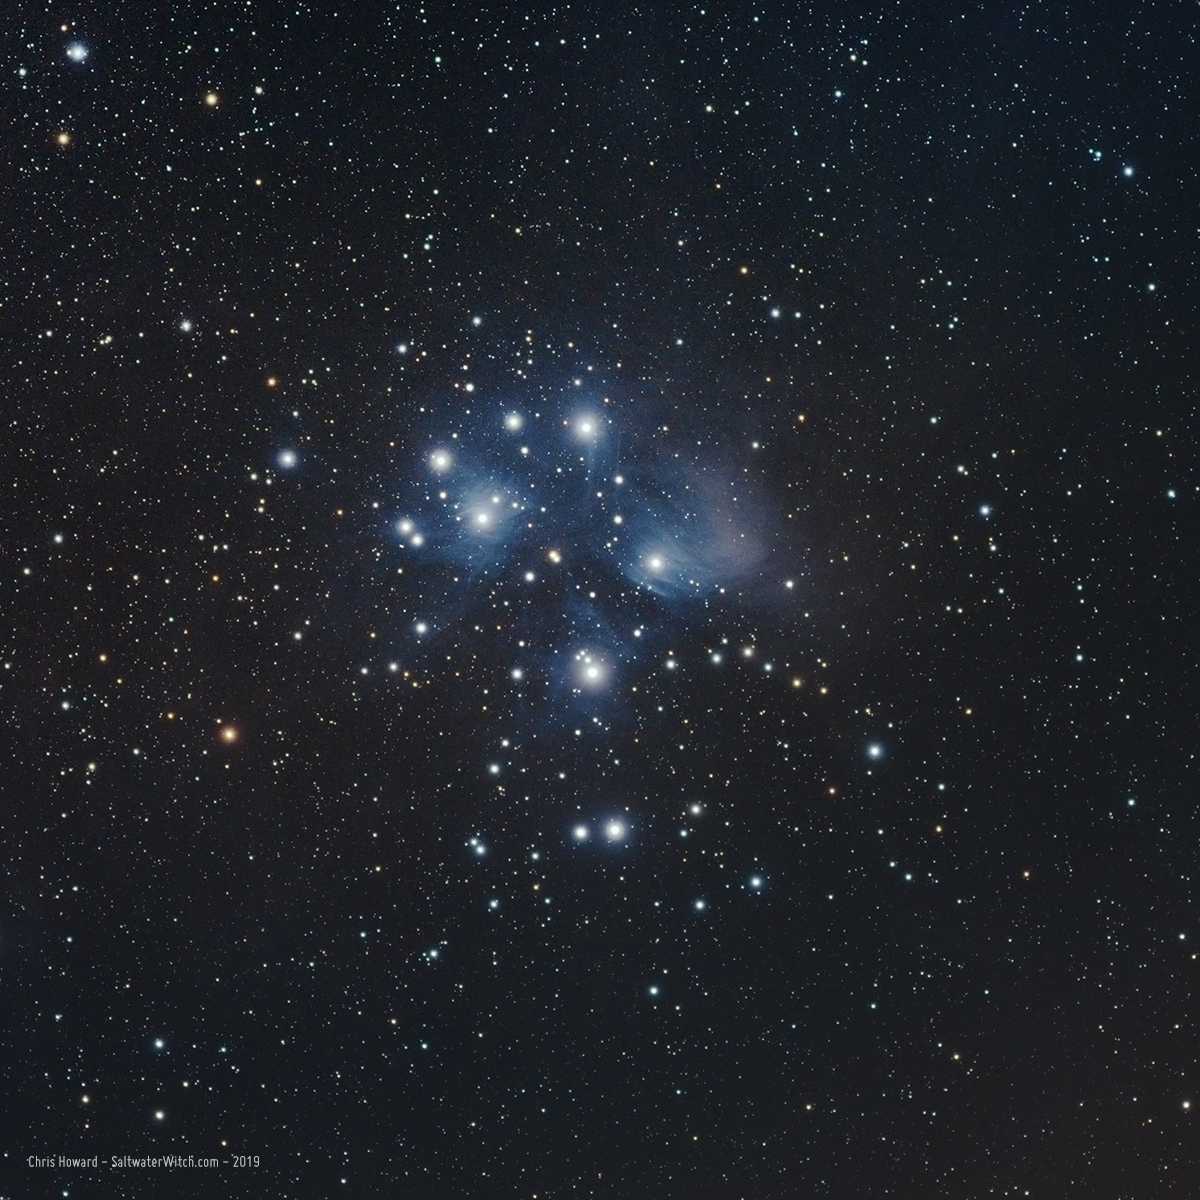
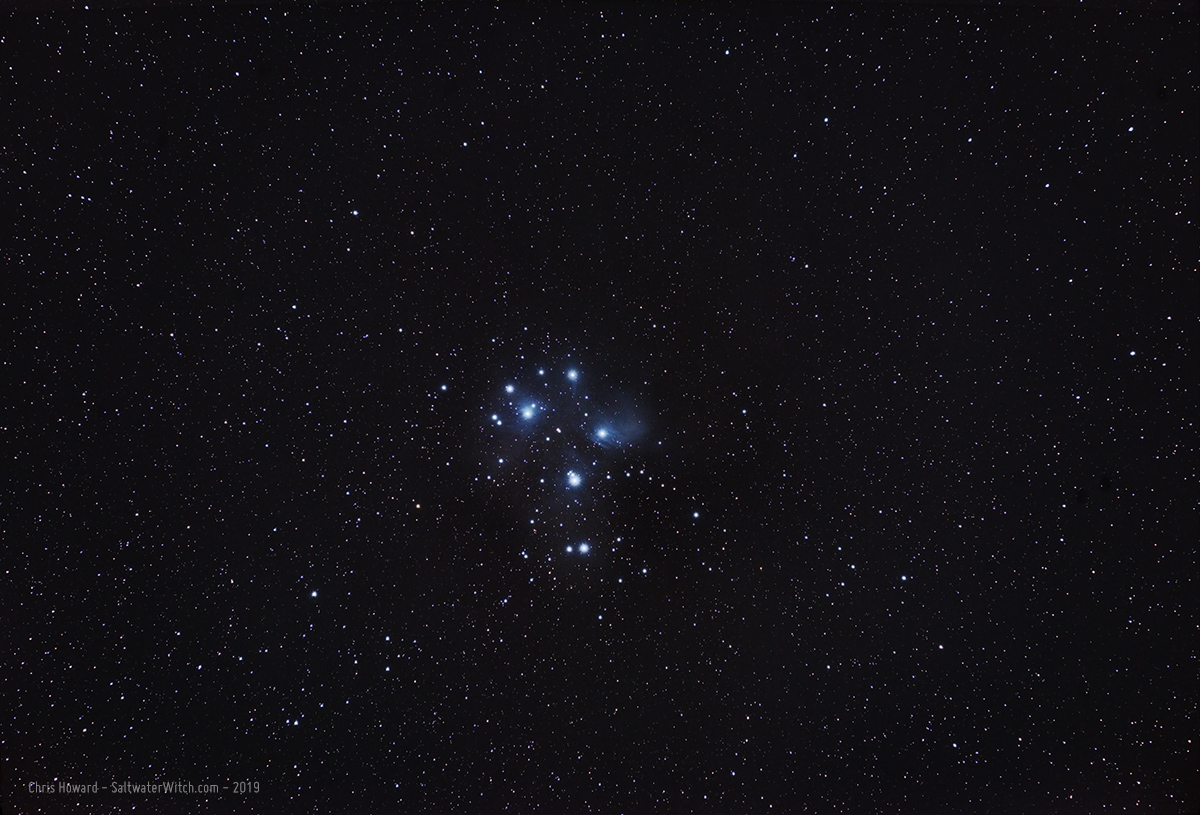
And then a little later I shot 51 25 second shots of M45, the Pleiades--this time at 300mm:
Posted October 5, 2019
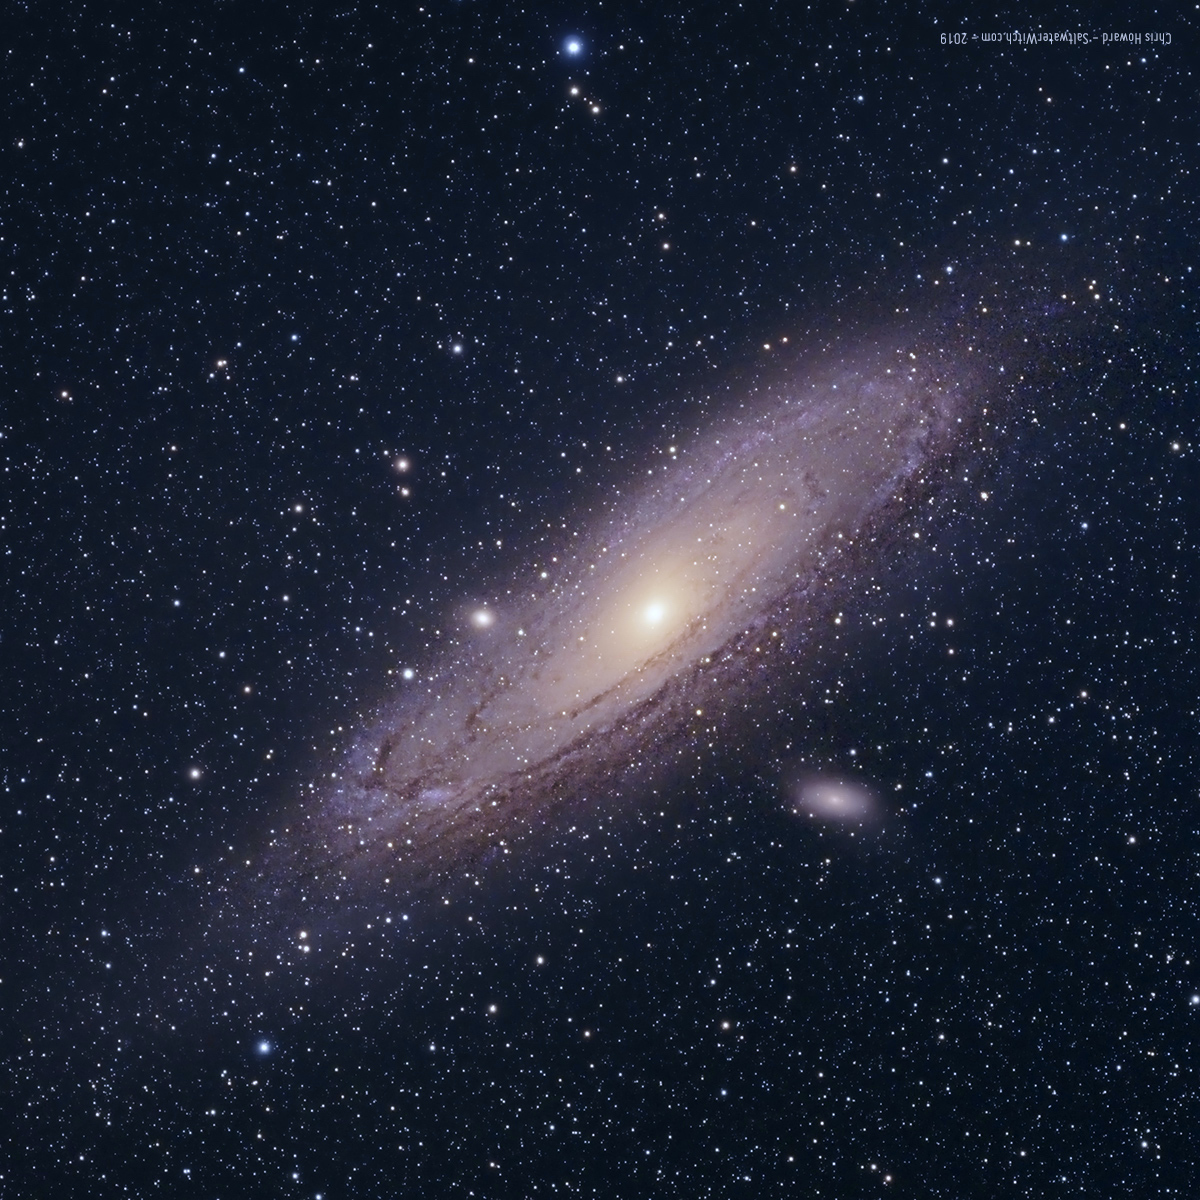
M31 Andromeda off the red end of the spectrum
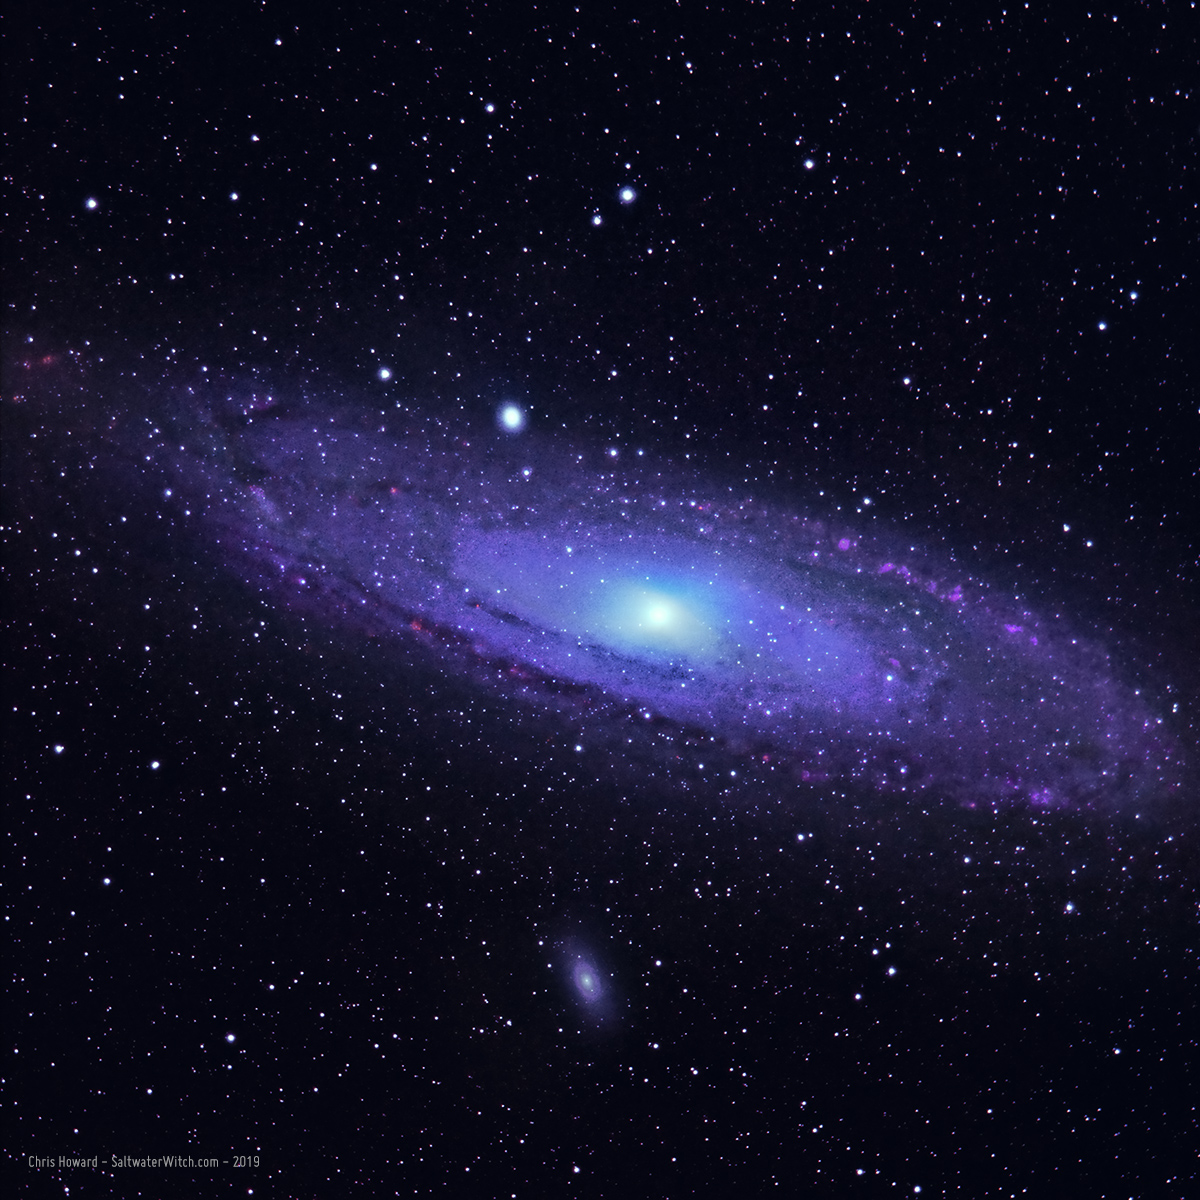
The Andromeda Galaxy (M31) is our largest and most magnificent galactic neighbor, about 2.5 million light-years away from earth (or 780 kiloparsecs if you're of a more serious demeanor). Here's my bi-color version in near-IR and hydrogen-alpha. With a 685nm IR longpass filter I have managed to get a ring in M110 (NGC 205) the dwarf elliptical galaxy and satellite of Andromeda (center bottom). Wasn't expecting that. I am assuming the rings are an artifact of processing or cut-out gaps between bandpasses in the filtering because M110 is an elliptical galaxy, which are evenly distributed bundles of stars without arms or distinguishable belts like a spiral galaxy, e.g., M31, Milky Way.
Anyway, I'm enjoying the variation I'm getting with infrared imaging. More on the way! I may upgrade to the Astrodon Sloan Gen2 i’ (695 - 844nm) near IR filter at some point, but I'm happy so far with the results of the less expensive Optolong 685nm.
M31 in color, one my images from early this year: