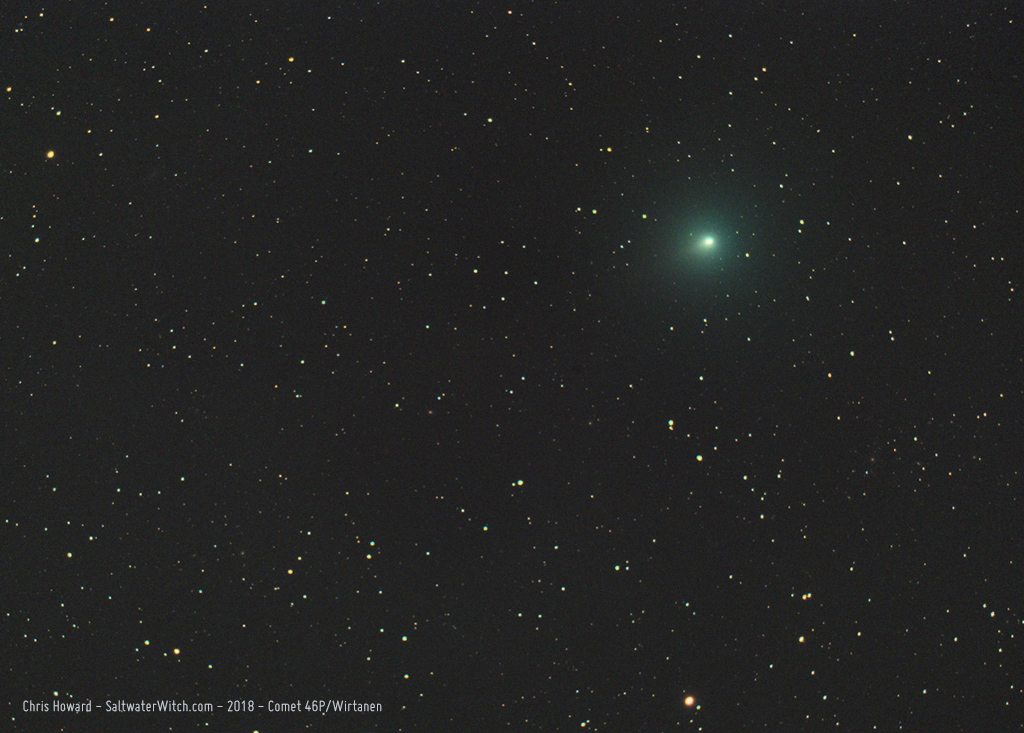
Comet 46P/Wirtanen
I caught Comet 46P/Wirtanen in one 240-second exposure as it was passing through the constellation Eridanus. Next week 46P will pass about 7.2 million miles (0.0774 AU) from Earth, it's closest approach for the next 20 years. William Optics GT81, ZWO ASI071MC camera, Orion Atlas EQ-G
Posted December 9, 2018
Rainy Weekend Project - December 1, 2018
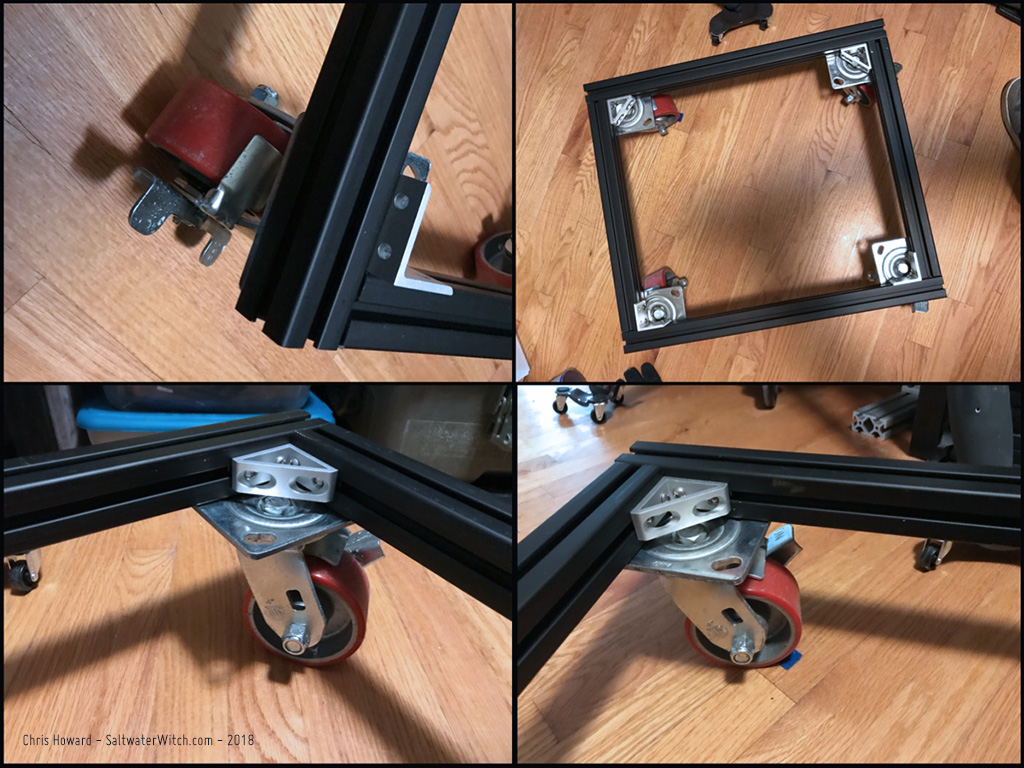
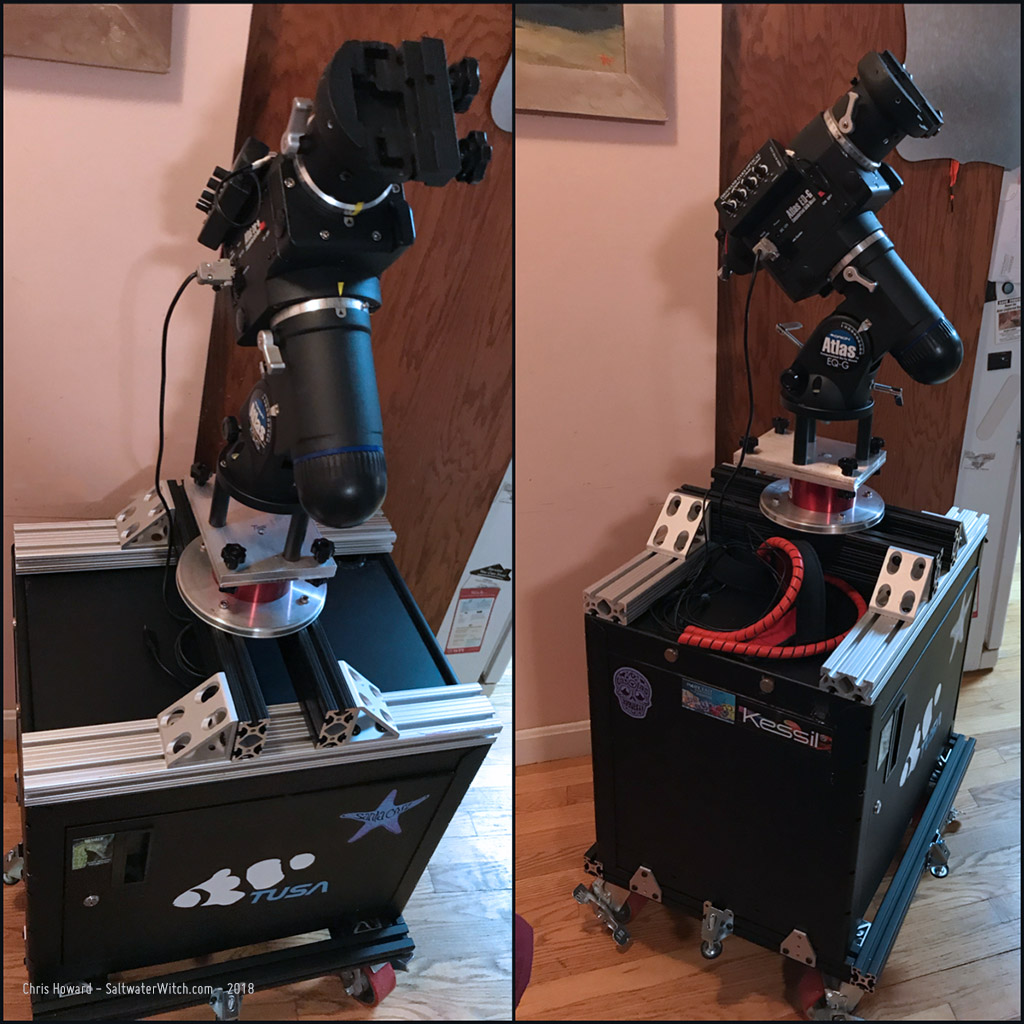
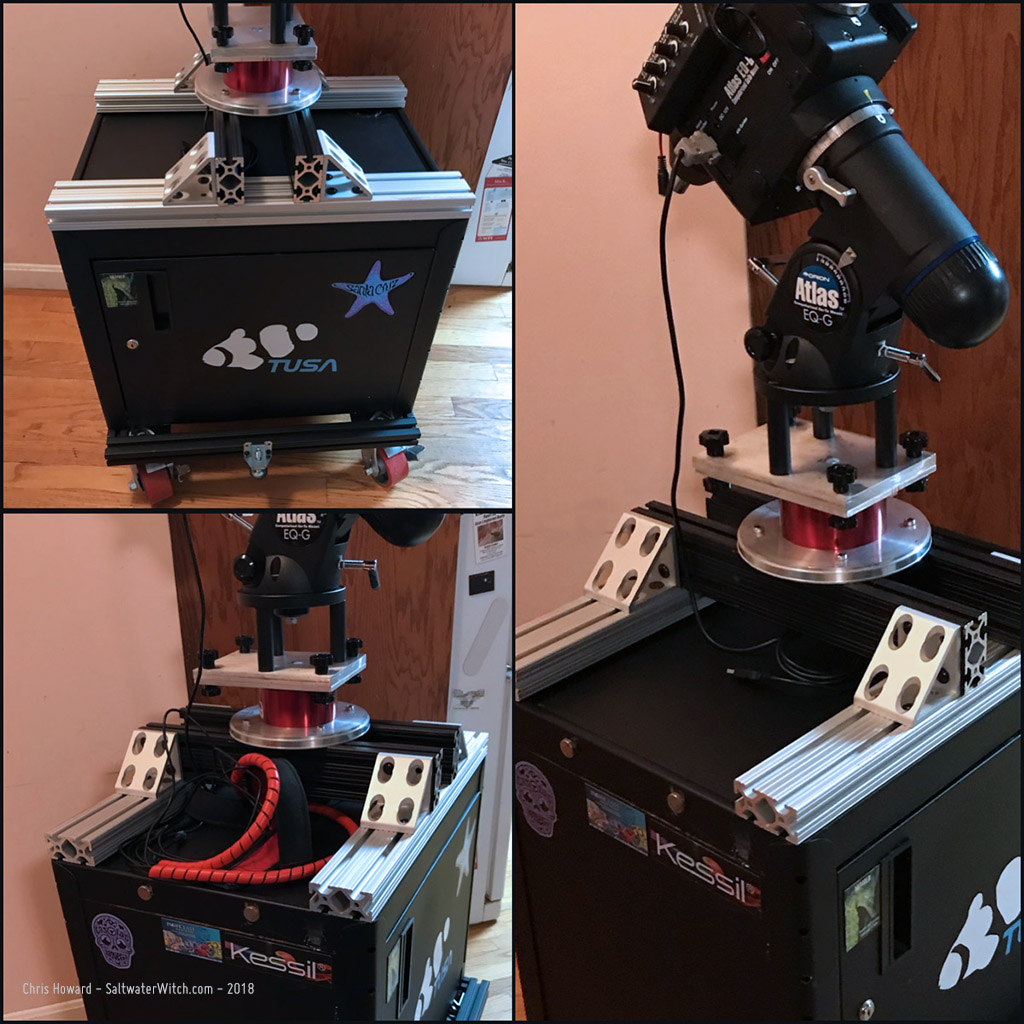
I started this--the top part with the pier made of 80/20 Series 15 T-Slot Aluminum beams and angles--about a year ago, or maybe longer. I never really used it though, because I needed some place level to anchor it. Taking some more t-slot beams I made a base for some super-duty castors and bolted an old steel AV Cart cabinet to it. This has become the base for my next set of astro sessions, where I will be wheeling this out to the driveway, leveling it (threaded leveling adjustments on each side), polar aligning, and then we'll see how the astro imaging goes. I'm looking forward to getting more of the western sky, most of which is blocked by the house when I'm shooting from the backyard.
Posted December 2, 2018
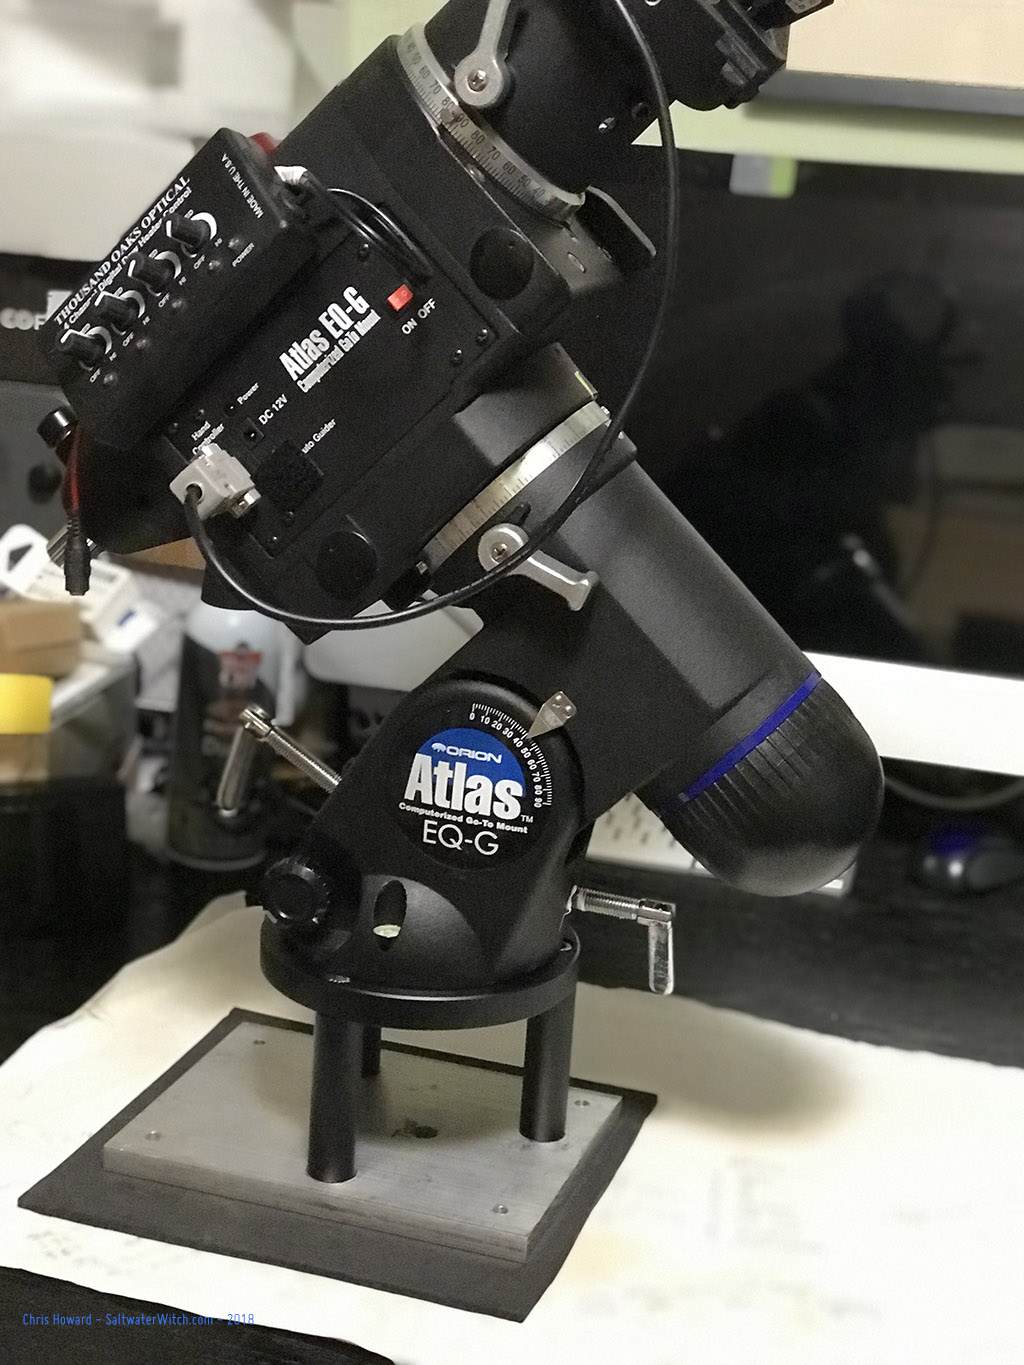
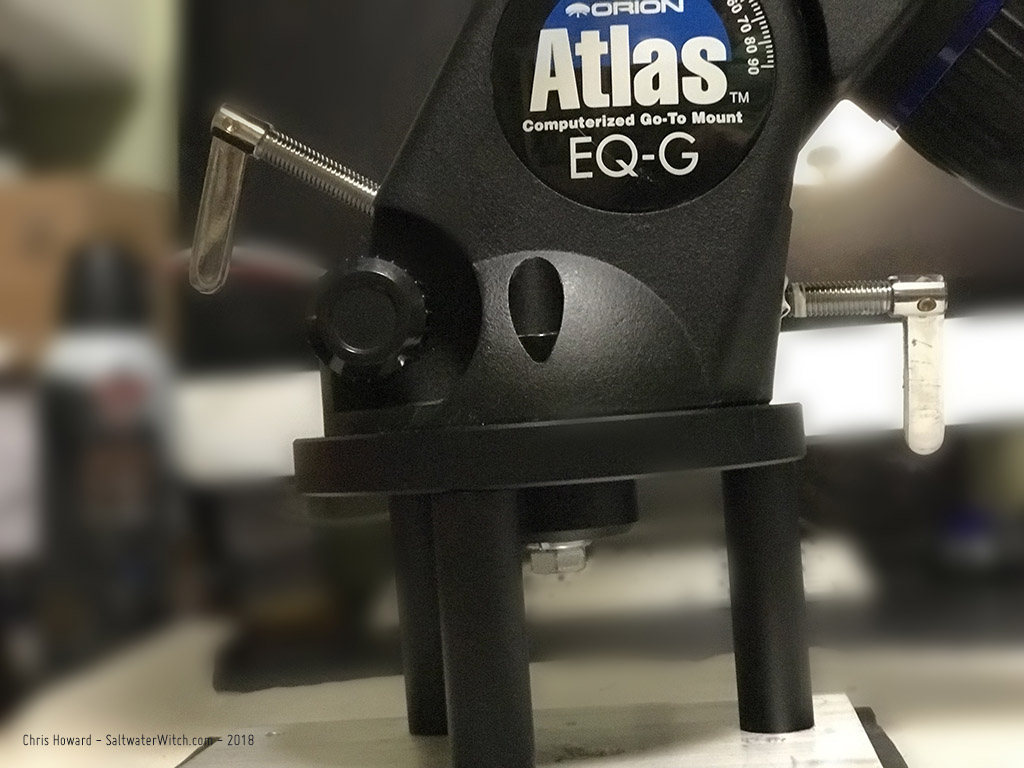
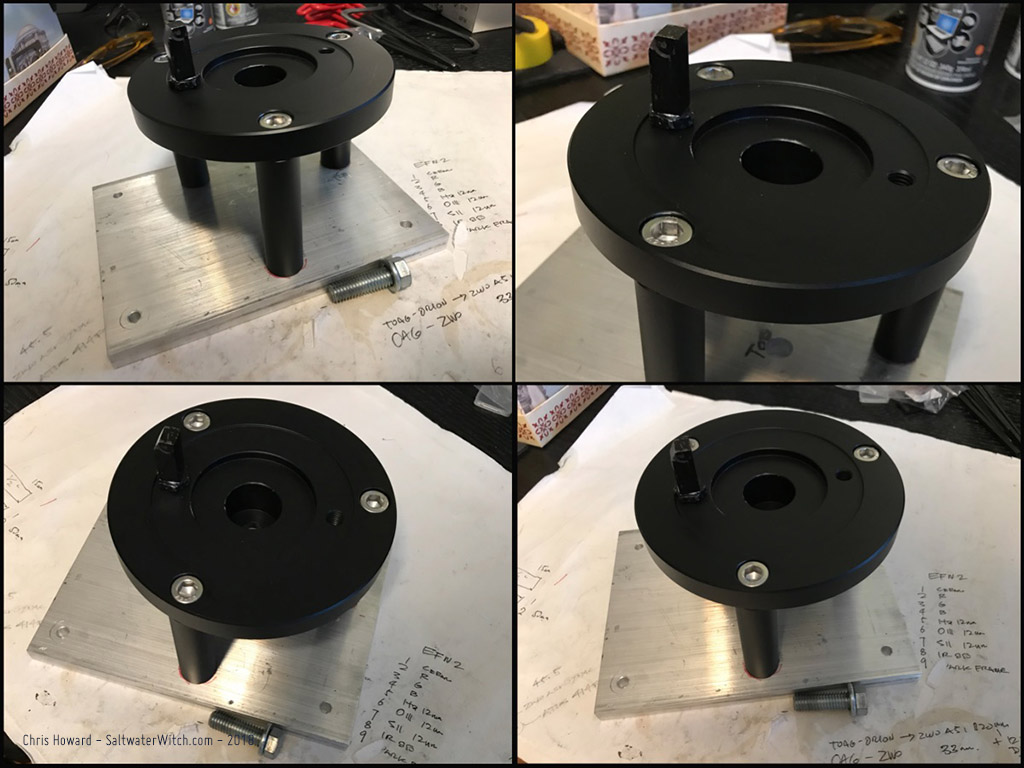
Pier upgrade for my Orion Atlas EQ-G - November 28, 2018
I worked on this over the weekend, but I have been planning it for a while. I now have both my mounts--Orion Atlas EQ-G and iOptron CEM25P on identical aluminum mounting plates, drilled to match the base plates on my backyard pier and my tripod. I'm using the iOptron Tri-Pier Adapter (8036-TK) for this. It comes with the heavy duty aluminum upper plate (connected to the mount), three posts, and stainless steel hex cap bolts. I drilled the aluminum plate with the same four hole pattern I use on the pier and tripod. I drilled and tapped three holes for the adapter. This thing is solid!
Posted November 28, 2018
Astro Session - November 10, 2018
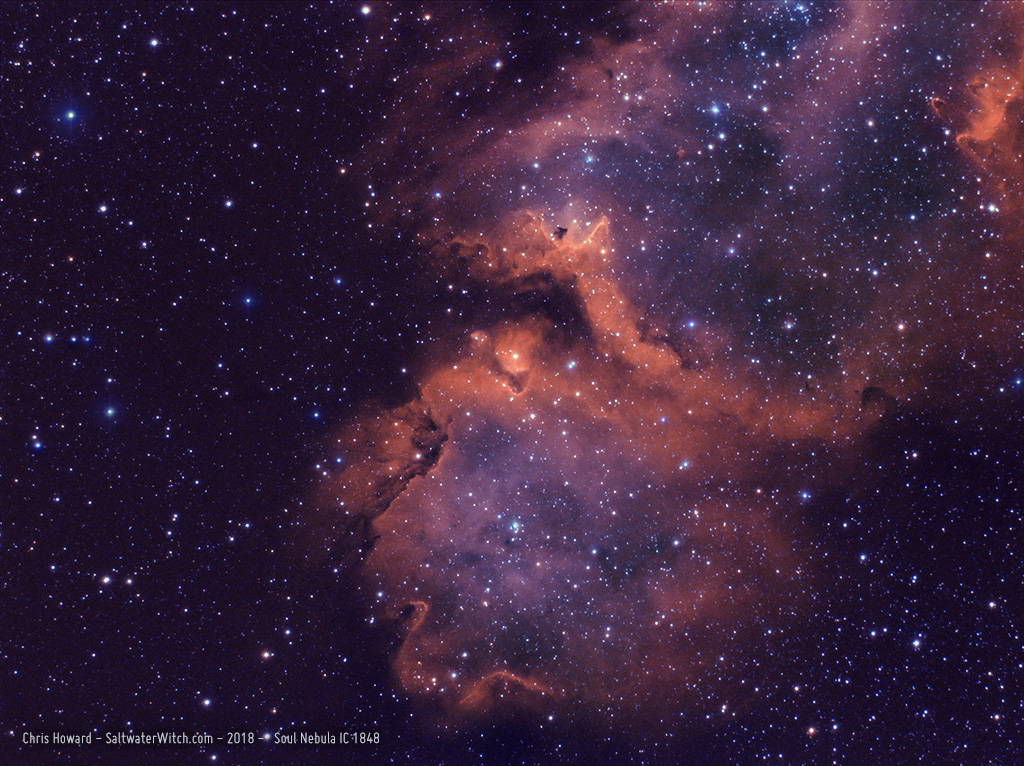
Soulful Friday--more importantly it was a cloudless Friday on the 10th. I'm going to have to do a mosaic for the whole thing, but for now here's the southern end of IC 1848, the "Soul Nebula" in Ha and OIII (Soul is also identified as Westerhout 5 and Sh 2-199). IC 1848 is in the constellation Cassiopeia, and what you see here is a bit more than half the 100 lightyears in length of the whole nebula--so what is that, something like 588 quadrillion miles from top to bottom? At 6,500 light-years away, that will make a nice four panel mosaic. (Notes: 40 x 240 seconds in Ha, 28 x 600 sec. in OIII. Atik 414EX mono CCD, Astronomik 12nm Ha, OIII filters, William Optics ZS61 + WO Flat F6A f/4.7, iOptron CEM25P EQ mount, Orion OAG + ZWO ASI120MM-Mini guide cam, Stellarmate OS (INDI/KStars/Ekos) running on Raspberry Pi 3b+)
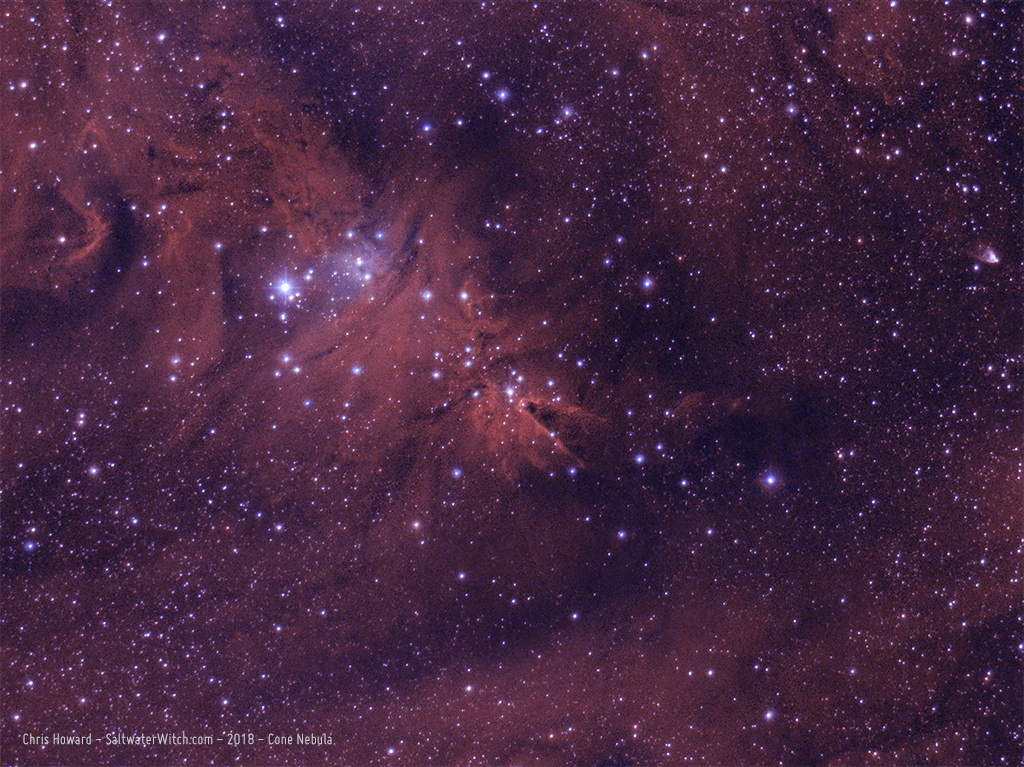
This is the first time I've captured any subs of NGC 2264, the Cone Nebula, about 2600 light-years away (800 Parsecs) in the constellation Monoceros. NGC 2264 includes several identified objects, including the Cone Nebula, Fox Fur Nebula and a massive variable star system, the Christmas Tree Cluster at its core. (Notes: 61 x 300 seconds in Ha, 48 x 300 sec. in OIII. Atik 414EX mono CCD, Astronomik 12nm Ha, OIII filters, William Optics ZS61 + WO Flat F6A f/4.7, CEM25P EQ mount, Orion OAG + ZWO ASI120MM-Mini guide cam, Stellarmate OS (INDI/KStars/Ekos) running on Raspberry Pi 3b+)
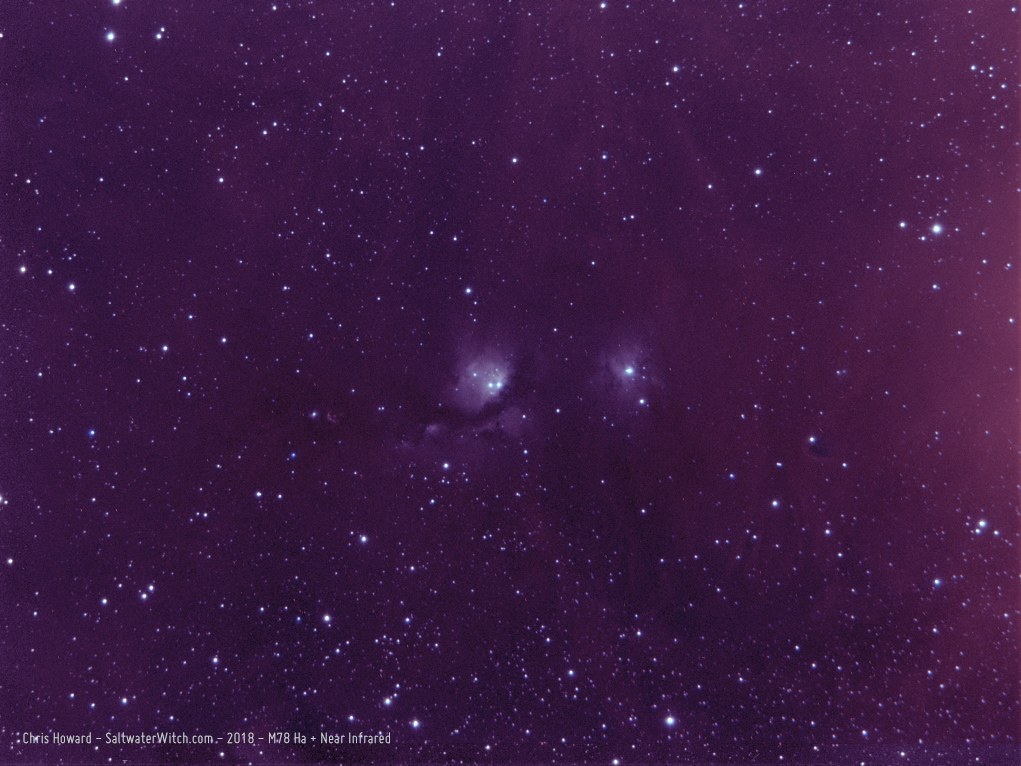
Near-Infrared: I also captured 40 frames of M78, a reflection nebula in the constellation Orion. I captured 20 of each in Ha (~656nm) and infrared with the 685nm longpass filter to see what showed up, and was surprised by what I could see in the unstretched subs. There really is a lot going on at the red end of the spectrum--and beyond, and I combined both of them in this shot, divided evenly across RGB (R=Ha, G=50%Ha/50%IR, B=IR). The plan is to come back with a set of color frames and see if I can combine the whole set.
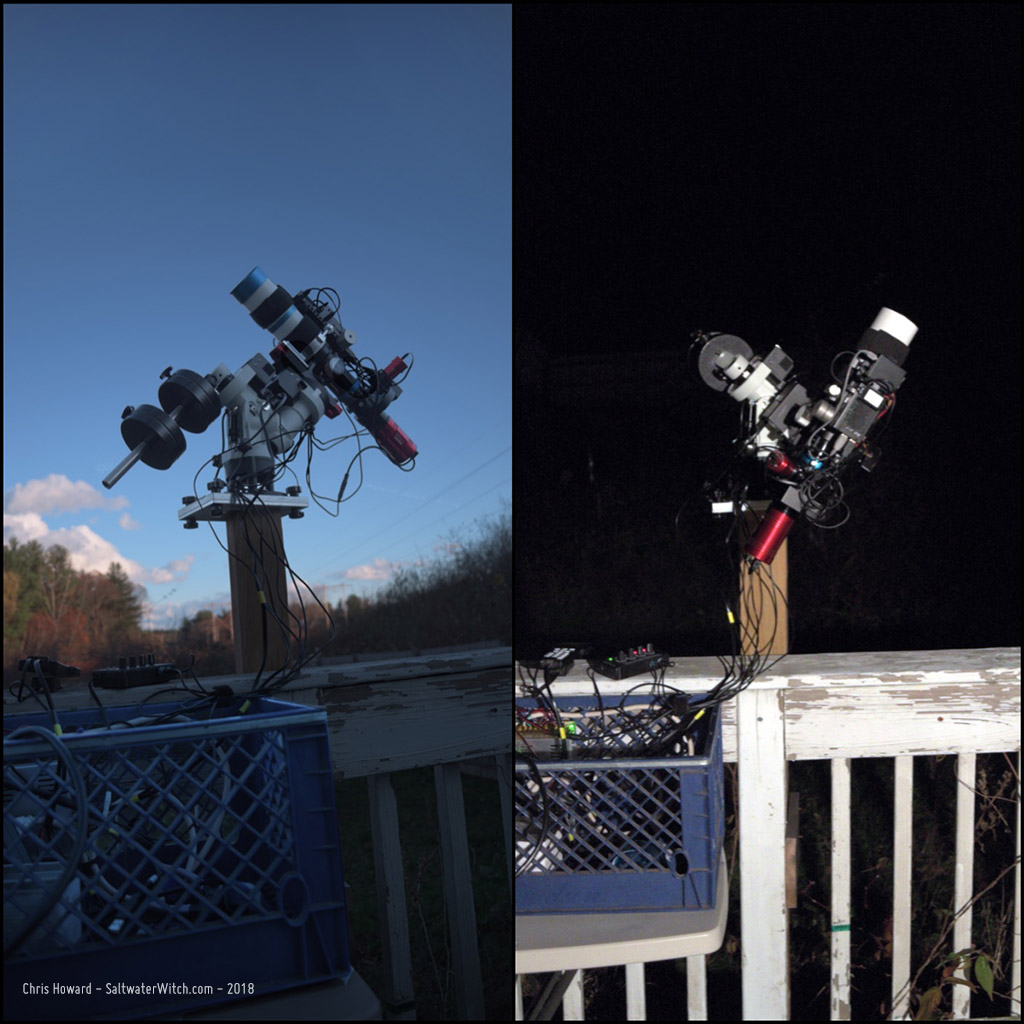
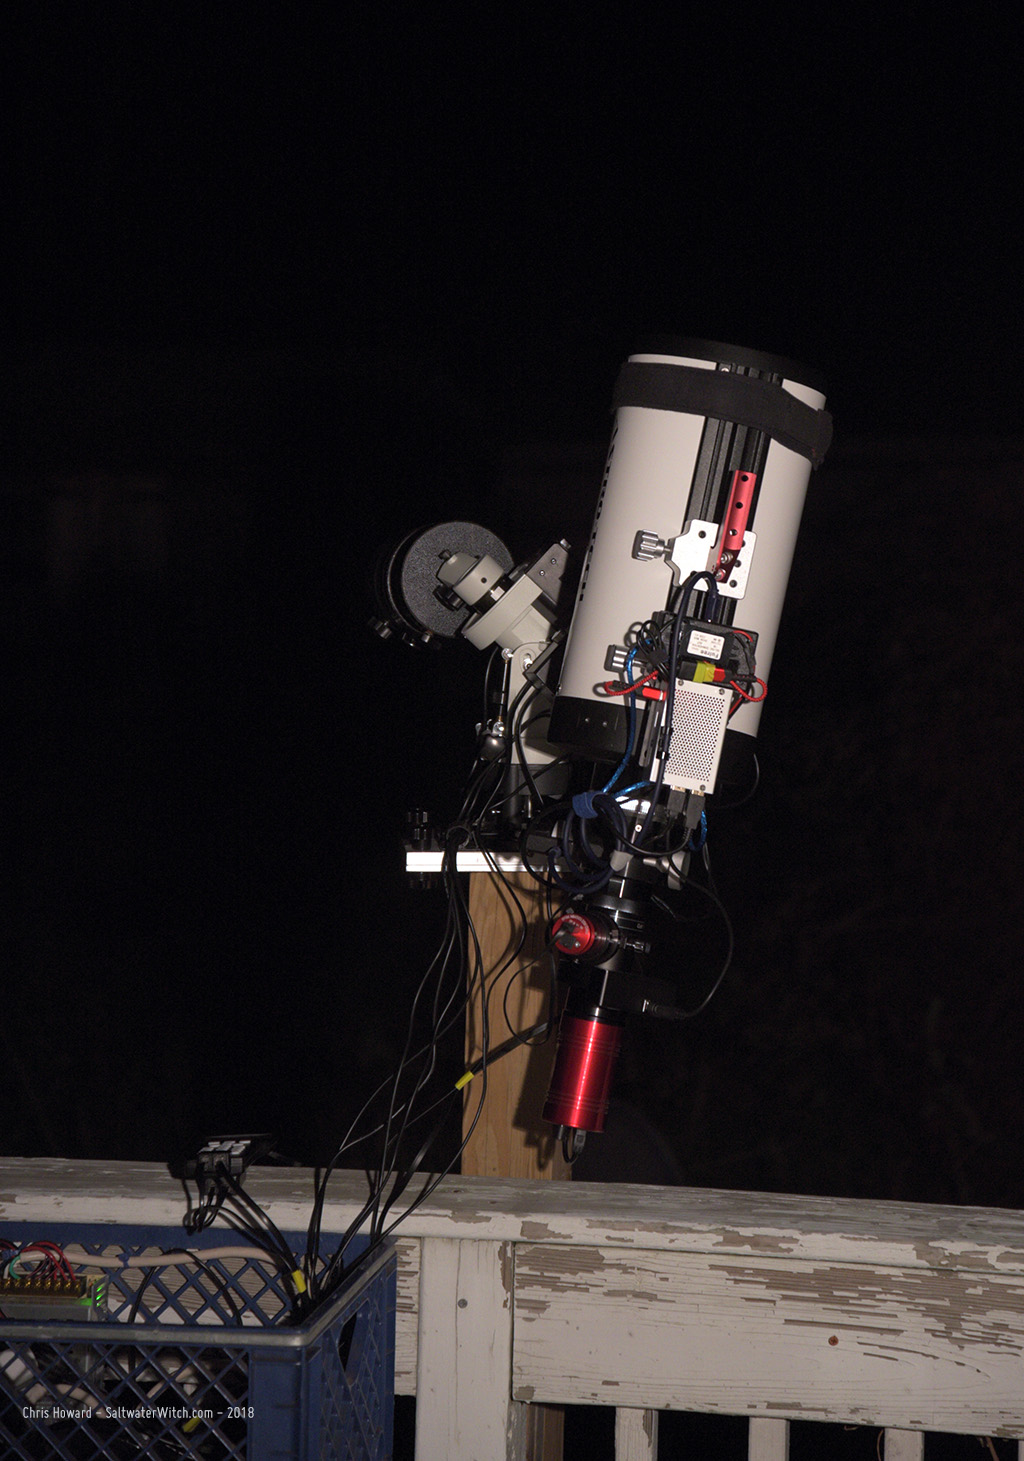
I took some pics of my narrowband setup for this imaging run, before nightfall and in the middle of shooting frames for the Cone Nebula just before Meridian Flip.
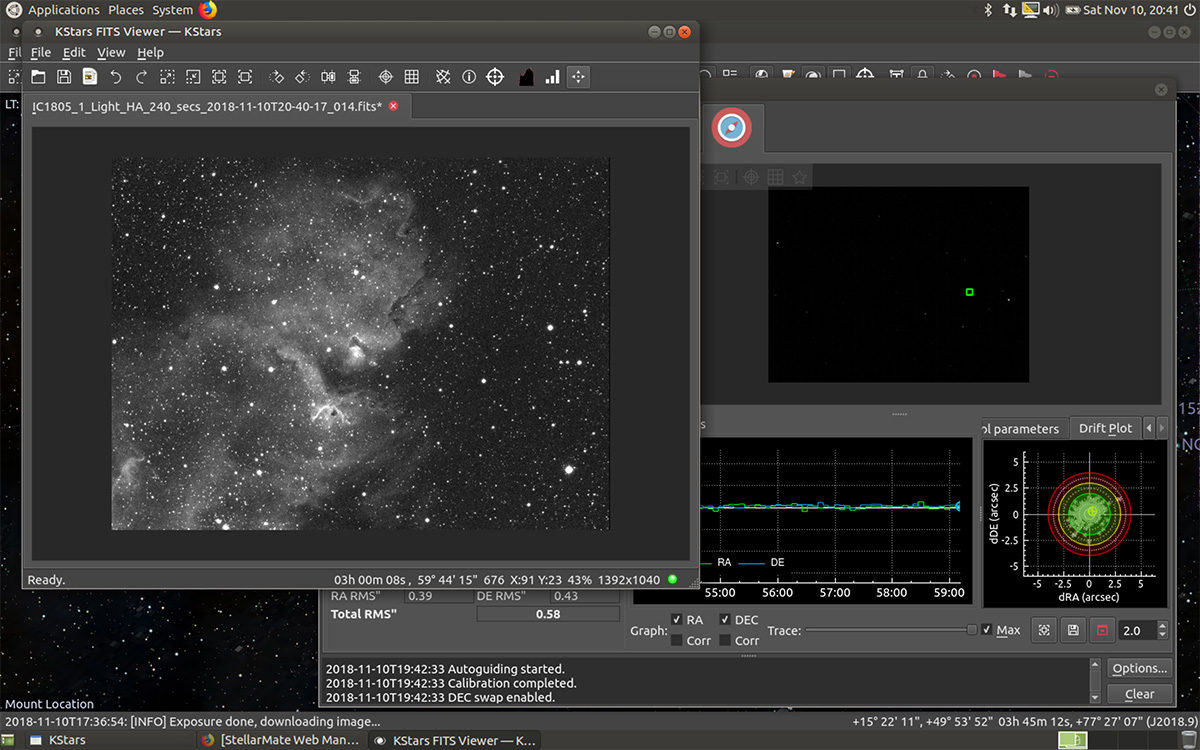
Here's a screenshot of Ekos and KStars running, with the guiding tab opened. It was pretty windy, so an RMS" of 0.58 is great, but overall my guiding has improved since going to an Off-Axis Guider. I'm now using the Orion Thin OAG on both trains--color and narrowband, and the difference is noticeable. It took some time to dial sensor and focus distances in, but results are clear, and I just don't think I'll ever go back to a guide scope.
Posted November 11, 2018
Astro Session - November 8, 2018
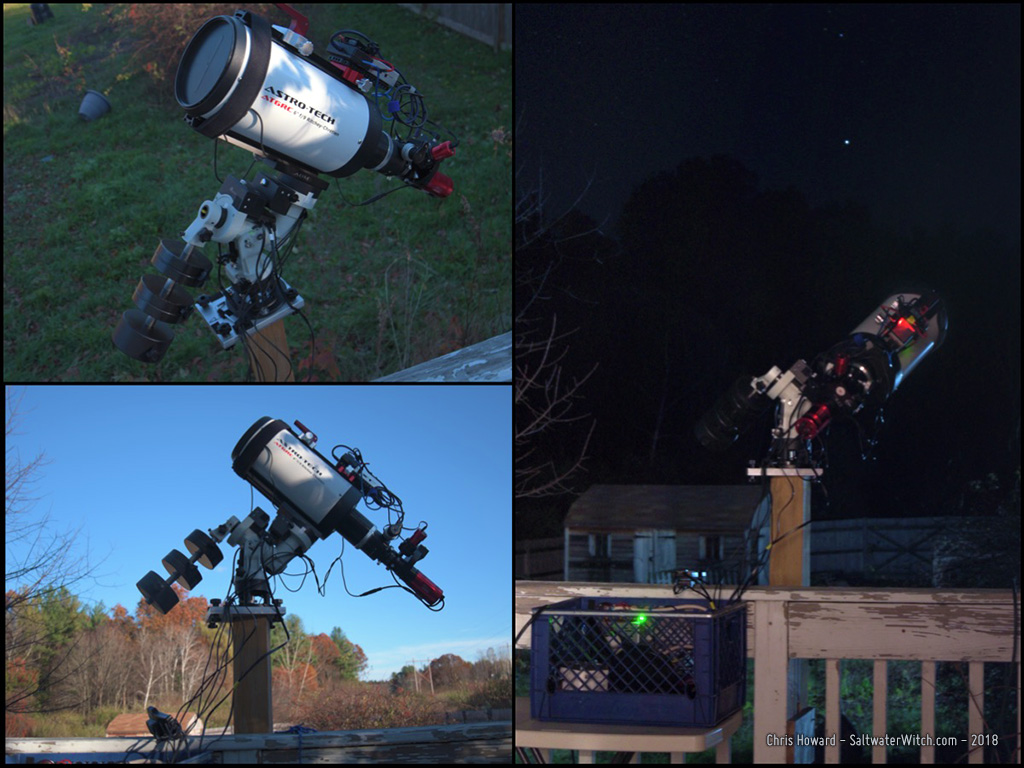
First shot of the season in the constellation Orion! I set up the AstroTech RC scope (6"/152mm aperture f/9) with my narrowband imaging train, Atik 414EX, ZWO filter wheel with Clear, Ha, OIII, SII & IR685, William Optics 0.8x field flattener/reducer that brings the AT6RC to f/7.2 at 1080mm focal length. With the Atik's 6.45μ pixels this has my resolution at 1.23 arcseconds per pixel, and a field of view of 0.48° x 0.36°.
Here are some shots of my set up last night, before nightfall, and in the middle of the narrowband run with 600-second exposures.
The 1000mm+ focal length did get me wonderfully close to the Horsehead Nebula (B33) and the reflection nebula NGC 2023 (bottom left) in the constellation Orion. This is what 46 stacked 600 second hydrogen-alpha frames will get you if you stretch things a bit too much and don't use any calibration frames. That would reduce the noise/graininess somewhat. Anyway, pretty happy with this. (46 x 600 second exposures in Ha, Atik 414EX mono CCD at -10C, Astronomik 12nm Ha filter, AstroTech AT6RC f/9 Ritchey-Chrétien + WO Flat6A f/7.2, iOptron CEM25P EQ mount, Orion OAG + ZWO ASI120MM-Mini guide cam, Stellarmate OS (INDI/KStars/Ekos) running on Raspberry Pi 3b+. Stacked in DSS, processed in Photoshop CC 2019).
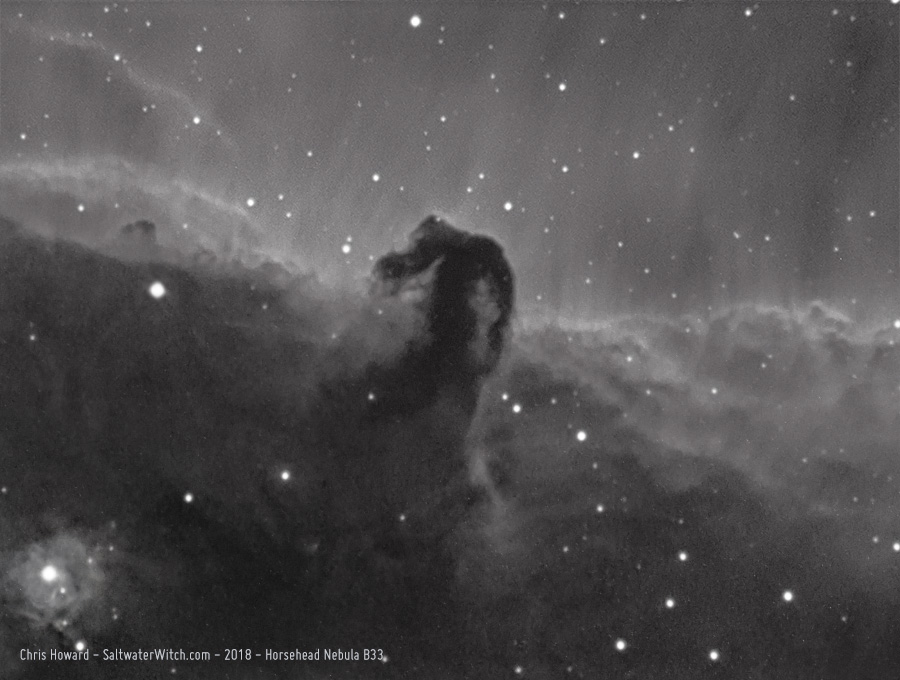
I stretched the hell out of this stack of 46 x 600 second subs, mainly to see what the data would show if I went out of my way to bring out the details. I also didn't use dark frames with this--so that's worth a try. The Atik 414EX at -10C or cooler is very clean, though. I usually don't gain a lot with calibration frames, but in this case even a little will improve the noisiness.
I don't use the AT6RC scope that much, mostly because when paired with the cameras I have the resolution is oversampled crap. The Atik is the only one that's right in there at 1.23 arcseconds/pixel, and that's with the 0.8x field flattener/reducer.
Another point (or set of points) I would like to make is the Astro-Tech 6" f/9 Ritchey-Chrétien is a $400 scope, and I'm pretty impressed with the light and contrast it managed to pull out of the night sky. Some of the credit certainly goes to the Atik CCD, which really is an amazing little camera. The sub-$1000 iOptron CEM25P has no problem with long exposure times. Along with the $129 12nm Astronomik Ha filter, this is a very inexpensive narrowband setup. The point being you don't need to spend a raft-load of cash to start capturing those beautiful HII regions, supernova remnants, and other wonders in the night sky.
My tips for the iOptron CEM25P--or what I've learned over the last two years: For narrowband, I normally shoot 5, 10 or 20 minute subs depending on the brightness of the target, and the iOptron has no problem. However, there are a few steps I go through in order to get very long exposures from this mount. 1) a solid foundation--solid tripod or better. I don't have a concrete or steel pier, but I do have a treated 4x4 solidly in the ground, and it doesn't move. 2) More counterweights, closer to the center of balance. I try to use more weight, and keep them as close to the top of the counterweight shaft as possible. I know it's tempting to use fewer weights farther out, but trust me on this--and don't worry about the bushings that carry all the weight. They can handle far more than you'll ever bolt on. It's minor, but it does smooth out tiny movements the scope has to make--so improved guiding. 3) Balance, balance, balance. You want a perfectly balanced scope and equipment. Don't bias weight to one side; don't get your gear "close enough". If you'll permit me to anthropomorphize the CEM25P for a moment, you want the mount and motors to think they're moving nothing at all, and for that you'll need to balance the shit out of your payload. I use small 100g camera gimbal weights to even the load--balance is that important. (https://www.amazon.com/gp/product/B0797S81HR)
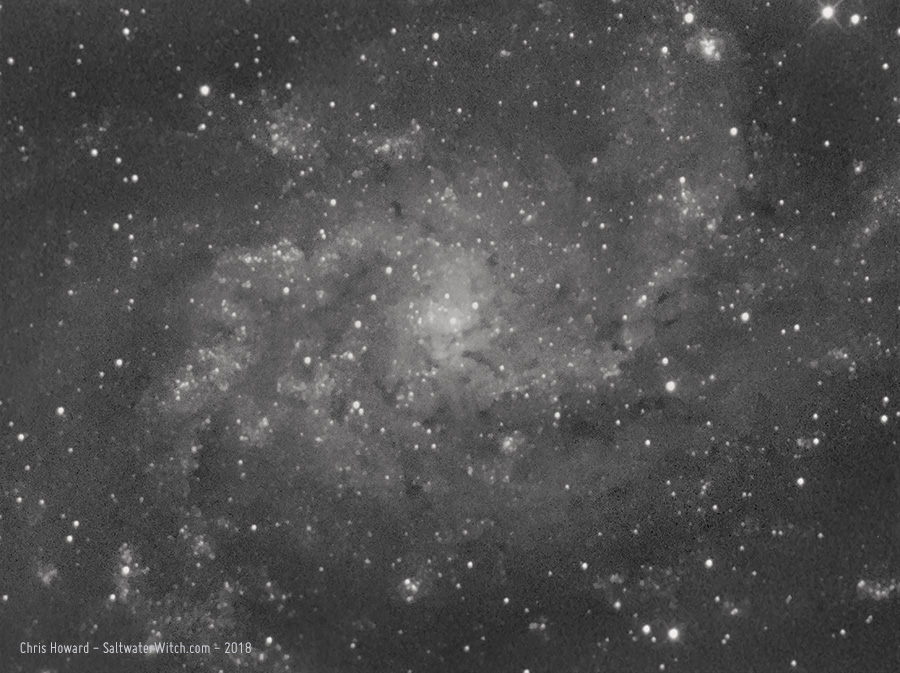
Okay, I also took some subs of the Triangulum Galaxy core (M33) while setting up and getting into focus--testing out shooting in 2x2 binning, which reduces the resolution by half.
Posted November 9, 2018
Astro Cart: November 5, 2018
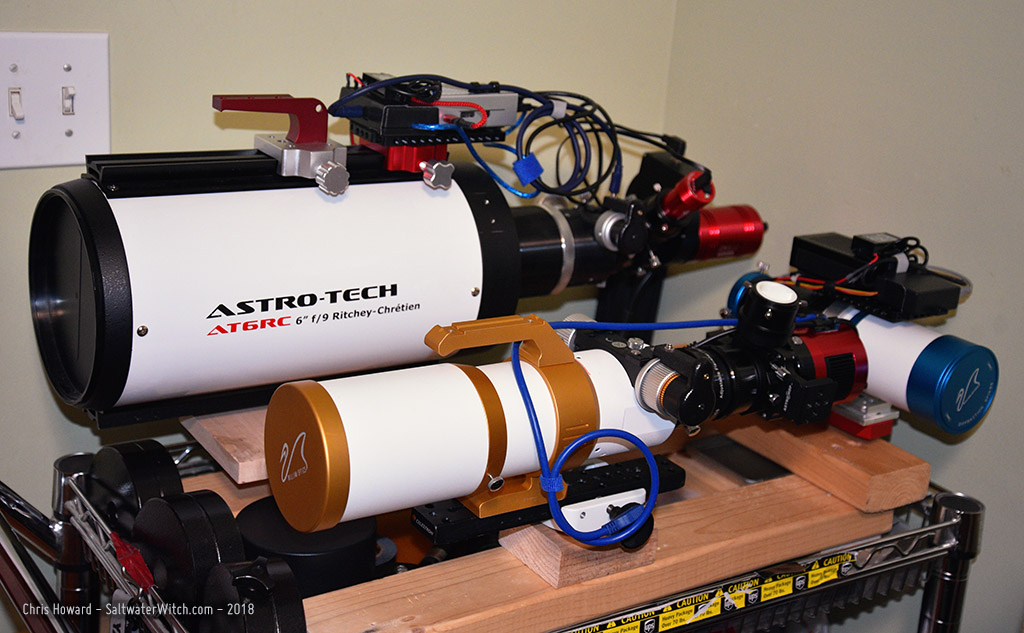
Here are three main scopes on my "astro cart", which allows me to wheel the gear right up to the back door. Tonight I setup the Astro-Tech RC scope with my narrowband imaging train--Atik 414EX monochrome CCD camera. With the 0.8x reducer it brings the scope down to f/7.2 and a 1080mm focal length. I want to try taking subs with 2x2 binning, which reduces the resolution by 1/2, but effectively doubles the size of individual pixels.
Posted November 5, 2018
Astro Session: October 30, 2018
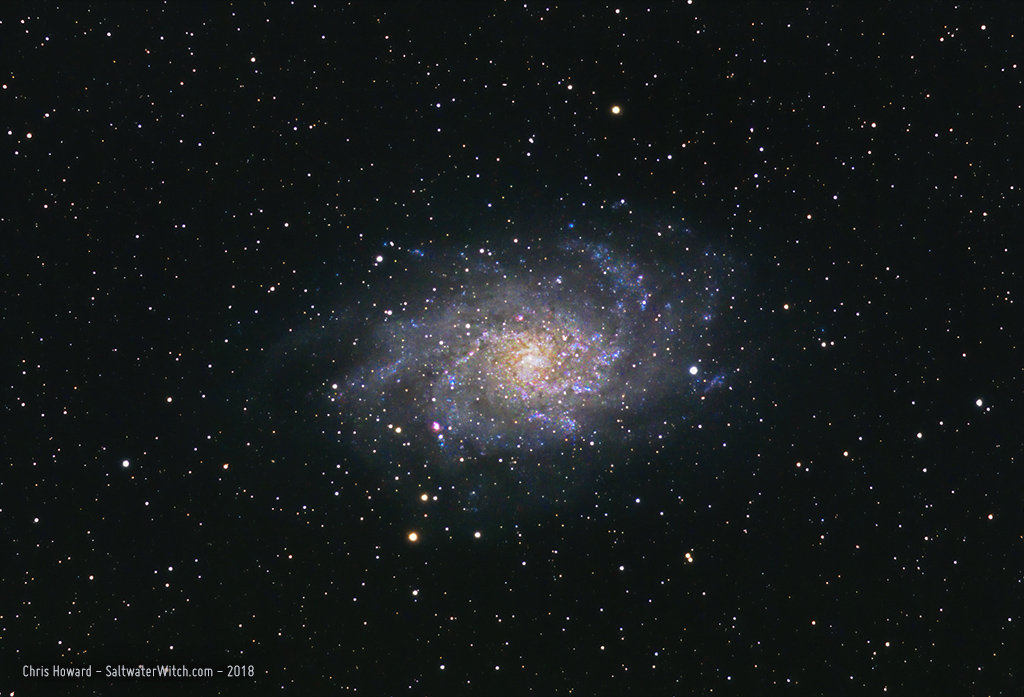
I had several hours of clear skies, still relatively dark before the moon rose, and I set up the William Optics GT81 and ZWO ASI071MC color camera to take a bunch of subs of M33 and M45--Triangulum Galaxy and the Pleiades, two of my favorite targets this time of year--but this is my first time shooting these with the ZWO ASI071MC cooled color camera, and the resulting images show how amazing the ZWO is. (ZWO ASI071MC running at -10C, William Optics GT81 + WO Flat 6A II f/4.7, iOptron CEM25P EQ mount, Orion OAG + ZWO ASI120MM-S guide cam, Stellarmate OS (INDI/KStars/Ekos) running on Raspberry Pi 3b+).
The Pleiades, M45, also known as "The Seven Sisters" and in Japanese as Subaru (昴). It's one of the most identifiable objects in the night sky, but it's more than just a loose group of stars. Located in the constellation Taurus, the Pleiades is a nearby open star cluster mostly made up of a batch of relatively young B-type stars amid (or behind) a reflection nebula that appears to surround and fill the space between the stars with veil-like sheets and threads. (WilliamOptics GT81, ZWO ASI071MC: 60 x 60 second and 60 x 120 second exposures, unity gain).

Triangulum Galaxy, M33, is a nearby spiral galaxy--around 3 million lightyears away, with as many as 40 billion stars. It's the third largest galaxy in our local group, and appears to be bound up in Andromeda's gravitational pull. It also contains some amazing nebulae and other deep space objects, e.g., NGC 604 is a massive H II region--that's the bright pinkish blob, the size of a large star, at the lower left side of the galactic spiral. Keep in mind that nearly every star-like point of light in this image is actually a star in the Milky Way, our own galaxy. (WilliamOptics GT81, ZWO ASI071MC: 90 x 60 second exposures, unity gain).
Posted October 30, 2018
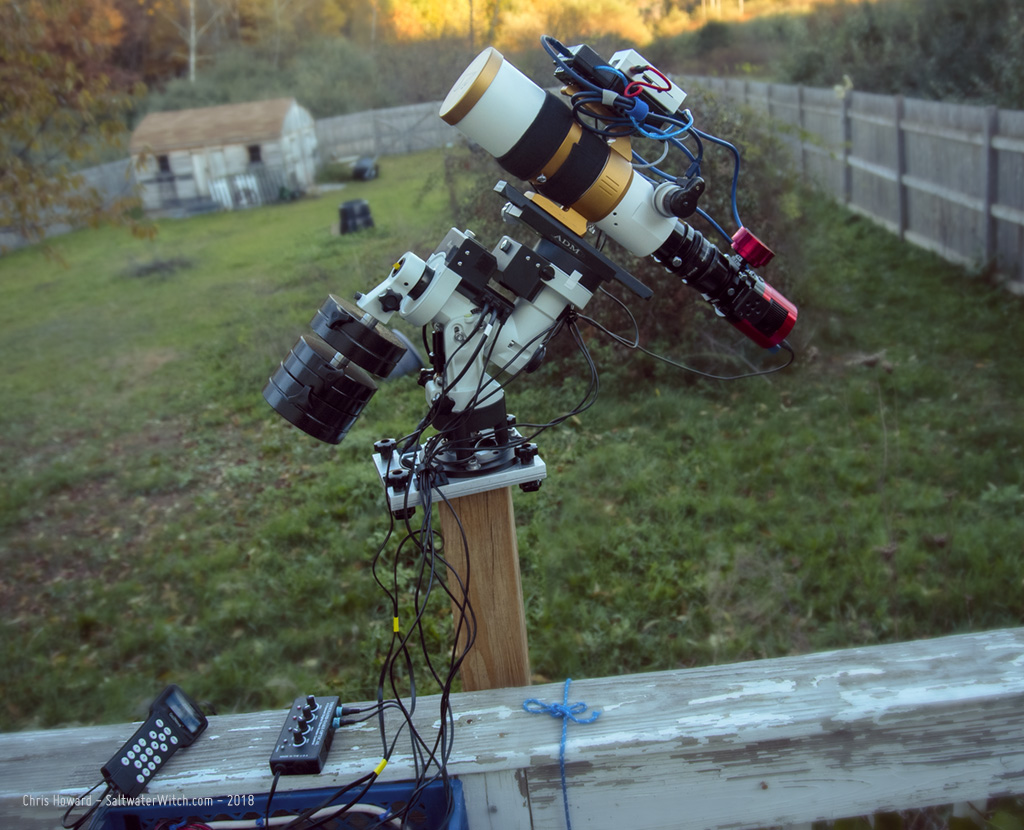
iOptron Mods: October 26, 2018
According to several weather sources it's not going to be clear after 8pm tonight, but I set up the William Optics GT81 anyway. Two reasons: I need to test out an adjustment I made in the spacing from the WO FLAT 6AII, to see if it corrects some star elongation at the corners--I added a 3mm M48 spacer just between the flattener/reducer and the off-axis guider. Second, I'm testing out some plans I have with Stellarmate (INDI, Ekos, KStars) on a Rasp Pi 3B+ (faster, with AC wifi). This one will be dedicated to this color imaging rig, with an auto-starting Ekos equipment profile.
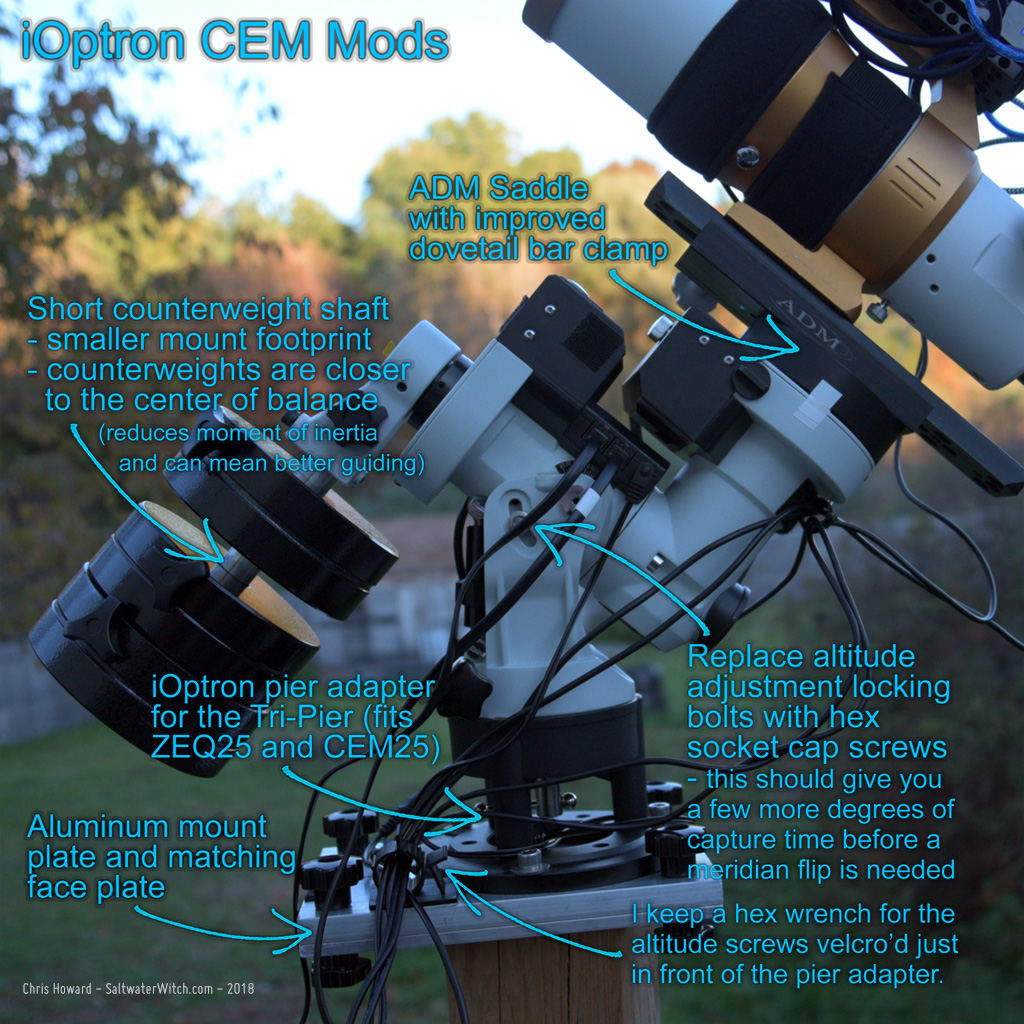
I put together a list of modifications and upgrades I have added or built for my IOptron CEM25P mount, and included them in one handy image--with arrows and descriptions (see below). Over the last year this has become my primary telescope mount (over my Orion Atlas EQ-G), partly because I've been doing most of my astro-imaging work with 81 and 61mm aperture refractors (that's a William Optics GT81 in the upper right). The other advantage of the CEM25P is quick setup time. I can have this bolted to the pier plate, polar aligned, and ready to image in about five minutes.